Caution: Long post ahead!
Well, we saved the best for last, at least in our opinion, ha. We know it's the one you all have probably been wanting to see the most.
The original kitchen was smaller. Almost the same layout but just not as long (i.e. fewer cabinets/drawers, less counter space, etc). For us, having a big kitchen was a must have. We opted for an alternate layout that lengthened it. This also allowed for some big changes, including the bigger, longer island which you saw HERE last week.

Here it is! 18 feet long x 13 1/2 feet wide.
Let's start at the sink.
We made sure we had it out of the island and wanted it under a window. It will be under this window looking out onto the front porch.
This is a photo from a model of our floorplan, and this is what our window will look like. We'll have a great view, in fact, I mocked up this to show what we'll see:
Ha! There will be porch railing in this view of course but hey, we'll be able to see the front yard, the driveway, the sky for the weather and most importantly, 2nd Man can watch while I'm mowing and have that glass of cold lemonade ready when I take breaks, LOL!
But wait, there's more! We didn't want a sink like that one above. Why not get...
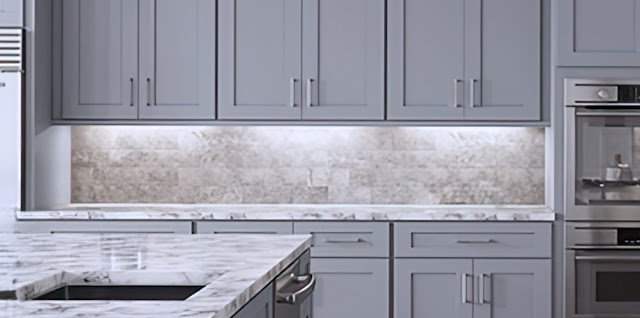
...a farmhouse sink! One thing we were adamant about was no divided sink. Divided sinks just make washing large pots and baking sheets and pans so much more difficult. We had the choice of stainless-steel apron front or this ceramic white version. We opted for this one. Side note, this photo shows gray cabinets like we'll have, so picture this being pretty close to our final design. We wanted a large faucet, and this one is very similar to what we will have. Again, an upgrade to have a more flexible design in the faucet to make cleaning up easier.
Next to the sink will be a dishwasher, as is standard.
Here's where we also made a big change. Remember in the pantry, we are putting floating shelves on the back wall? We got that idea because we wanted it to match this:
We are taking out a section of cabinetry to have some floating shelves in the kitchen! By the way, we won't have this tile all the way up behind ours, it will be a normal height backsplash. Anyway, we are having two shelves just like this, they will match the gray cabinet color, and 2nd Man will display his favorite sets of mixing bowls. They'll be pretty to display (nice little pops of color, little works of art) and easily accessible for use. The shelves are mounted into studs for weighted items, so no worries there.

Here's what ours looks like on the drafting plans. You are looking at this straight on (as if you were standing in the island) and so on the left side, those are the cabinets coming out in an "L-shape" from that wall. We will have the floating shelves on one side of the window and then regular upper cabinets on the other side. We opted to split the standard lower cabinet there in exchange for a narrow cabinet on the left side and then three drawers next to that. Normal cabinets below the sink for "sink stuff", the dishwasher next to that and then we are leaving the lower cabinets on the far, right side. However, we are doing this inside of those cabinets:
When you open the cabinet doors, there will be three slide-out (adjustable) shelves. It will be much easier to access things inside that we need and not have everything get push to the far back.
Electrical is as we usually do, lots of outlets, ha. And they will be mounted under the cabinets, so we don't have plugs in the wall.
Oh, and also undercabinet lighting installed throughout the kitchen. Lots of lighting in the ceiling throughout the kitchen.
Like the sink photo, here is a photo from the same model version of our home (it was still under construction when we took these pictures). This is almost identical to what we will have (different colors of course) but there are going to be some changes. As you can see, it's a lot of nice counter space on either side of the cooktop. 2nd Man wanted good landing space on each side of the stove instead of being stuck up against a cabinet on one or both sides.
Oh, speaking of the cooktop, that was the first change we made. With no gas at the farm (and we didn't want to have to deal with propane), we needed electric. We removed the regular range and oven that would be in that spot and chose a cooktop. This photo has a regular 30" electric cooktop. We opted for a 36" induction cooktop. More on that in a future post on appliances.
Notice the oven with microwave above it in this picture? Remember last week in the post about the island we said we moved the microwave into it? With no microwave above the oven, what else would go there?
Well, instead of one oven...
...2nd Man is getting double ovens! Two times the fun! Two times the baking! Two times the roasting! Two times the amazing food!
But wait, that's not all!
Our vent hood will not look like the one in the model home photo, instead, we are going for this:
We wanted the exposed vent hood because we like the look of that. It'll be 36" wide to match the cooktop with bright lighting and will move a lot of air.
But wait, there's still more!
Before we ever even picked a house, we always said if we ever built or remodeled, we would have this:
A pot filler! It was an extra expense (kind of like opting for a rain shower head in the master bath shower), but for us, it will be worth it. Especially since the sink is a bit away from the stove to carry a heavy pot of water, especially as we get older.
Like the sink wall, here is the cooktop wall of our actual architectural plans. You can see the cooktop, vent hood, pot filler and double ovens we talked about above. But like the other wall, we made some more changes to the cabinetry. We kept the uppers as normal cabinetry.
With the cooktop, there is the fixed space directly below it (to accommodate the inner workings). Below that (as you saw in the model photo) normally there would be cabinets. In fact, all along that wall would be cabinets. We deviated from the norm. We've seen many shows and photos where the more practical way of a new doing a new kitchen is to have deep drawers in lieu of cabinets.
Not all shallow drawers but deep ones to hold pots and pans. No more digging around looking for something in the back of a cabinet. Slide the drawer out and there is everything you use. Grab what you need and go!
As you can see, there are six of those deep drawers and two shallow drawers. One of the shallow drawers will hold 2nd Man's knives and cutting implements. You may ask, where do you put things like spatulas and tongs and other things? The counter like we have now? The other drawer?
See those two narrow cabinets on either side of the drawers under the cooktop?
They will be pull out cabinets like this:
One side will have built-in containers for holding cooking utensils and the other side will be a slide out rack for oils, bottles, etc. Seemed like the perfect spot for something like this. 2nd Man is so excited.
Plus remember, when we turn around from the cooktop, the island behind us will have more drawers!
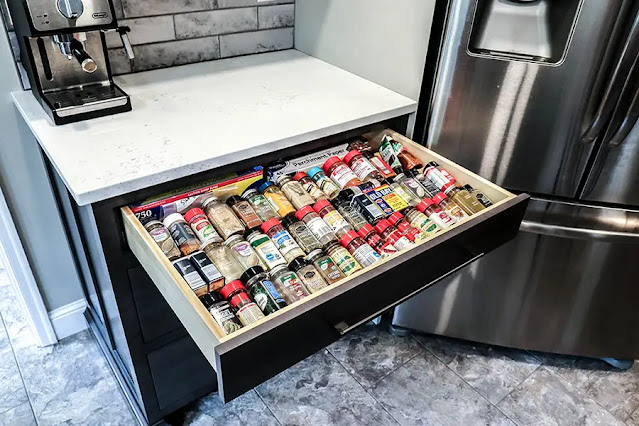
2nd Man is thinking one of the shallow drawers will need to look like the above, spices and seasonings!
On the architectural drawing, you can see the space for the refrigerator and a couple more cabinets above that. Speaking of more cabinets, did you notice something in the photos and drawings?
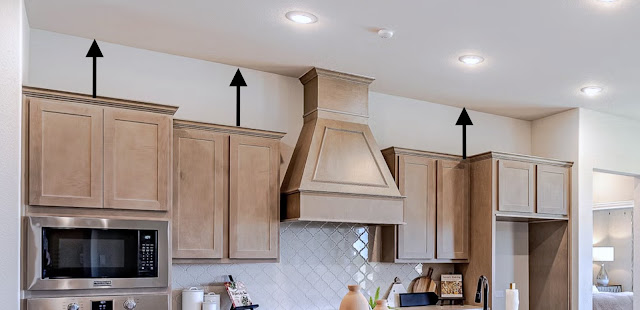
Normally, the upper cabinets stop and there is space above, like this:
We had this at our last house, and it was just a greasy dust bunny collector. It was also a waste of space. Sure you could put fake plants up there or bowls or knickknacks but then they get greasy and dusty, ha. You know that we are big about maximizing storage and that is space we could reclaim with cabinets.
So, we asked them to go all the way to the ceiling and that is what we are getting. We might need a ladder, but oh well. The builder had a great suggestion, use the uppers for the rarely used, once a year stuff. Like make one the birthday cabinet and keep birthday supplies up there, another one could hold the Christmas and Thanksgiving plates, etc. Smart!
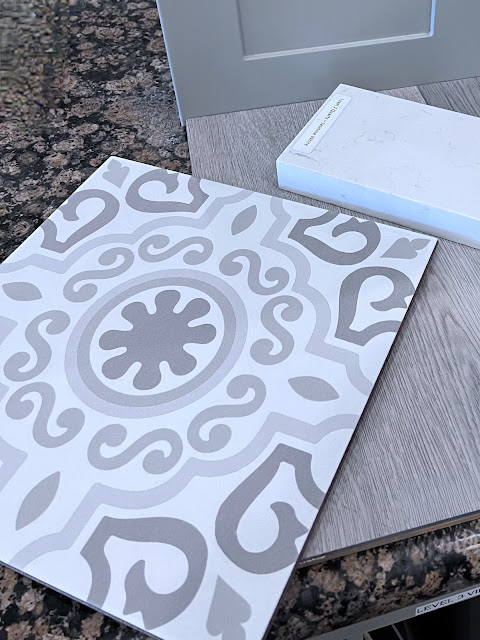
And lastly, the decorating choices. We have the gray cabinets as we have mentioned. For the counters here though, we are going with white, like we showed on the island. It's a Carrera marble look but quartz. For the backsplash, we are going different.
We chose this ceramic tile for the backsplash. It should add some visual interest and give a different kind of look than just subway tile as is so common now (which we love but we just wanted to do something a bit different for us).
And speaking of something different, the last big thing we did was this:
We are taking this area (outlined in this photo) above the cooktop and between the cabinets, to go with something that we hope looks pretty awesome...
...this tile will fill that spot from counter to ceiling. We hope it adds a really nice focal point behind the stove, it almost looks like a patchwork quilt when all put together into a pattern (we laid some side by side to see what it looked like). Somehow, it seemed appropriate for the farmhouse.
So that's it...the kitchen of our dreams! We got everything we ever wanted in a kitchen and prep space and food storage space. We planned ahead and got it all. The builder rep said most people spend all the upgrades on bathrooms and media rooms and stuff like that, we spent ours where it matters most to us. Wonderful meals and prepping to be fully stocked.
We cannot wait for the cooking and entertaining to begin!


