We tried something slightly different this year.
We started dry brining our turkeys a couple years back and had such success with it, we kept that part the same. Some of you have asked about dry brining. It's similar to using a brine liquid in the refrigerator only here you let the cold air do the same thing.
 |
| Dry brining turkey |
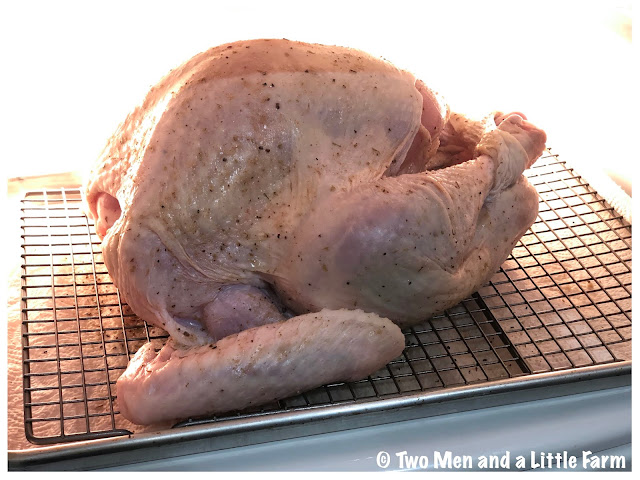
First unwrap the turkey. We always try to get a fresh never frozen bird. You could of course use frozen but for this you need to make sure it's thawed in time to do this process so plan ahead. Remove the giblets if there is a packet in there, let it drain and place on a wire rack over a baking sheet (so cold air flow around it). Pat it dry with paper towels but don't wash it. You want it to be as dry as possible so the salt/seasonings stick.
Next, season it with salt and whatever flavors you like. We used a blend we make up ourselves, kosher salt, pepper, garlic, marjoram, thyme and other dried herbs. We call it our "farmhouse blend", ha. Be generous, just rub all over and if you can loosen the skin, rub it inside as well. We also season the cavity. Just make sure every surface has salt and seasonings. This is the part that duplicates what a brine solution does. Pretty much whatever you would put in a brine you can rub on your turkey or even used a store bought rub, just make sure it's got salt in it. This is important for the process.
That's it. No oil at this point just place it in your refrigerator. We put it in Tuesday evening so that by Thursday morning it is ready to remove. Take it out and let it come to room temperature.
 |
| Dry brined turkey |
This is what it looks like when you remove it. The skin has tightened up (and will eventually be wonderfully crispy). It looks like it has changed colors but that is the process of dry brining, the salt brings the juices to the surface of the skin and then over time, the juices go back into the bird (with the seasonings) and this pulls the skin tight and opaque.
Now this is where we changed what we have done in years past. Can you see the jar in the background? DUCK FAT!
 |
| Turkey with duck fat |
You shouldn't have to season again at this point. This is where you can use butter, olive oil, whatever oil you want to use. 2nd Man decided to use duck fat after seeing it used on chicken. Rub it all over, inside the cavity, under the skin, don't be stingy. Duck fat adds AMAZING flavor.
The picture above is after it was oiled.
You could put it over veggies on a roasting rack (and with the duck fat that would be delicious) but we keep it simple and just put it in the oven as is. It's already on a foil lined sheet and sitting on a rack and we've got sides cooking so this works fine.
We had an 11 1/2 lb turkey. We did this at 425 degrees for 90 minutes. That's it. A larger turkey you might need to adjust the time up. You can check when the juices run clear and if you temp it, 160 to 165 degrees.
 |
| Dry brined and duck fat roasted turkey |
Here it is after the 90 minutes. Oh my. I have no words. It was SO good. The skin was crispy and flavorful and well, the meat was perfectly seasoned. Nothing else was needed.
 |
| Duck fat roasted turkey |
Let it sit a good 20 to 30 minutes. This allows the juices to reabsorb into the meat and then slice it up into pieces and serve. We used the time it was sitting to put the finishing touches on the sides.
2nd Man said he'd probably never cook a turkey a different way again. Why mess with a good thing?


Thank You
ReplyDeleteRight now it's making me hungry
We made another one too, ha! The apartment still smells like turkey and I'm hungry all the time.
DeleteThat looks amazing! What a beautiful turkey. Y’all really know how to cook delicious meals!
ReplyDeleteYou are too kind. Thanks, it really came out nicely and flavorful.
DeleteObviously, I have not had enough turkey this year. That makes me hungry. I like the idea of the foil on the pan and rack on foil. Is there foil under the rack in the first picture? It doesn't look like it.
ReplyDeleteI'll have to edit the post. Good point, no, no foil under the rack while in the fridge, we put paper towels under it to catch anything that dripped from the bird. Interestingly it was dry after two days. I think the turkey kept all of it's juices while dry brining like that. Then we put foil on the sheet pan just for ease of cleaning. The first turkey we took off the foil after dinner and the pan was completely clean. We used the really heavy duty grillers foil. It works great.
DeleteI have a turkey breast in the freezer-- I'll have to try it this way! Your pictures are making me hungry!
ReplyDeleteThanks for the explanation. Now I want to roast a turkey for Christmas. You always whet my appetite.
ReplyDeleteLove,
Janie