Showing posts with label Remodeling. Show all posts

Friday, June 20, 2014

NEW ROOF COMING SOON


So today begins the first step of a couple of big projects.   The first one, and probably most important, is a new roof on the house.  Here are some pics:

Farmhouse roof
Above is the general main part of the roof over the house and porch.  Not too bad but some shingles are coming up and there is some waving in the decking.  Below is the section over the mudroom that as you can see, is sagging a bit. (by the way, same color shingles, just the way sunlight was hitting them makes it look different).  

Farmhouse roof with sagging
It’s not in the best of shape.  It’s one of those things we’ve put off time after time.  We’d rather buy furniture and plants and build garden beds and fences.  You know the feeling...fun stuff like that!  Alas though, it’s a necessary expense.  Now that the inside of the house is more or less finished and furnished, we should make sure that there are no leaks to ruin what we’ve done inside.  Time to start working on projects on the outside (as evidenced by lack of paint and wood needing repair in the same photo).  So today, while we're both at work, a roofer is coming to give us an estimate.

While we will most likely go with shingles, we’re also going to get an estimate for the difference in making it a metal roof instead.  A metal roof is more expensive of course, but on a small house such as ours, we’re hoping it won’t be too much more.  We need to see if we can justify the expense.  A metal roof is resistant to hail and wind and other nasty stuff and it would certainly last the rest of our lives.

Shingle vs Metal roofs
What we’ve always heard is that rain sounds wonderful on a metal roof.  Is it loud though?  Does anyone have experience with it?  The house portion will be insulated from sound a bit with attic space between the ceiling and the roof so it wouldn’t be overly loud.  The porch however would definitely be metal over the ceiling with not much of a space  in between...so it would definitely be louder than inside the house.  Sitting on the porch in rain under a metal roof?

Sounds (no pun intended) like it could be nice!

Now of course, they may come back and say “regular roof is X amount, metal roof is ten times that amount”.  If that’s the case, then regular roof it is!  Then there are shingle colors to think about…it’s always something.


Shingle colors, image courtesy of Owen Corning Shingles
We're looking forward to having a nice new roof on the house...then it's on to the next few projects.   

UPDATE:  Haven't heard from the roofer, he went out between 12-2.  We are hoping he didn't run from the property screaming NO WAY!  haha.
It is more likely that he is working up estimates.  Will keep you posted!

Tuesday, March 5, 2013

WATER HEATER WOES

Part of what we have needed at the farm, to make it truly livable, is a water heater.  When we closed, the inspector said it was well beyond its life. It was a 10 year water heater about 20 years old.  We tried not to use it very often, but I'm here to tell you, no regular hot water makes for cold showers, and very difficult cooking/cleaning.  With Winter here, and us not staying overnight at the farm, we figured we'd put it off till this year.  Well, it's here, and so last Friday we went to the local big box store and bought a water heater.  Our problem was the place it's in.  I found out from 2nd Family that the water heater that exited there was installed and then a cabinet built around it.  Great.  Just great.  

So with the plumber the past weekend doing our other projects (connecting the new utility sink in the mudroom among them), we had to just keep our fingers crossed and hope for the best.


Here is the end result.  As you can see above and below, sections of the cabinet had to be removed, doors, shelves, trim, etc.  Being an old farmhouse, it wasn't perfect to begin with but now there will be some repairs to be made, painting to be done, etc.  There was trouble getting the old one out, he had to beat it with a hammer to dent it in so it would come out of the built in closet with less (!) damage than already done.  To top it off, when he drained it, the water smelled horrible.  Glad we weren't using it.  

Going in with the new one was a bit easier.  It sort of worked to let gravity get it into place, just push it to the opening and then let it fall in (gently of course).  However, even with that, there were problems and it's STILL not working!  Because of the original hookup and the modifications necessary for the old one to work, the new one needed some special connections.  The plumber started installing it on Saturday, and almost finished it Sunday. He needs a couple of special parts and will coming be back out this coming weekend.  Should only take him an hour or so but until then, we don't have hot water.  That was the frustrating part of the weekend; he was a nice guy but seemed easily distracted and not focused.  He could have finished it, but he let time slip away, he left early on Sunday and said he'd get the part this week and bring it back on the weekend.  Really?  You can't just drive and get it?  Sigh.


We can see the finish line, or perhaps the light at the end of the tunnel
(just as long as it's not a freight train coming head on, LOL) and so we'll wait until it's done.  We've been patient thus far, no sense in ending that trend now.

Once we have hot water, the house comes alive again.  The shower is usable.  We can wash dishes.  And clean.  And cook.  Even something as simple as washing our hands after working outside in the yard will now be possible.

Monday, November 12, 2012

UTILITY SINK FOR MUDROOM

Tabco Utility Sink
We have been searching for a utility sink for the mudroom, and wanted the right one.  Last year, we thought we had found it but we held off.  Now we really did find it!  We scoped out our local restaurant supply store last Saturday on a whim when it was raining (and nothing to do outside at the farm) and found one on sale. It was a floor model so we got a great deal on it.  They had the faucet for it and we got that as well. Here is the "official picture" from the website. 


This is the spot where it's going.  It's in the mud room where "Ma" (the previous owner) had her washing machine.  That means there is already hot and cold water and a drain in that spot.  It will need some minor plumbing work, but we'll work on that later, for now we have the sink and that's what we wanted most.  


Here it is after we took it out there yesterday and set it in its spot.  Yay!  I can't wait to add some shelves above it, maybe some hooks to hang things, and then we'll have a great sink area for filling large pots, washing hands when coming in from outside, and rinsing produce from the garden.  Hope to get this installed in a couple of weeks.

Tuesday, May 8, 2012

AIR CONDITIONING BUT WITH A GLITCH

Sears Kenmore 15,100 BTU Window Unit
Yay, we have cold air, but, alas, with an asterisk.

We bought two of them Friday night after work.  Since they were on sale at a great price, and were the largest BTU's you can get for 110V electrical, the timing was just perfect.  We got them loaded into the Jeep, took them out there, and carried the heavy monsters into the house.  The instructions, as I feared, left a little to be desired, but after about 2 1/2 hours, we had the first one in and turned on.  Wonderful cold air blowing into the room and it started cooling down the house, at least the front part of the house.

So we decided to go ahead and unpack and install the second one too.  Actually, 2nd Man voted for waiting until next weekend, but I said let's just do it, while we don't want to do it and get it over with.  You know, like when you just rip off a band aid.  So we did.  Second one only took about 30 minutes start to finish!  No, we are not available for hire, haha.  We turned it on as well, and there was even more cold air blowing.  It started cooling the back half of the house, and was awesome.  First time in years the house had been that cool,
well, on a 90+ degree day of course.
So we were enjoying it...until....
Blackout
With both of them turned on and running at the same time, they tripped the circuit breakers and everything went dark and quiet (not mention, warm).  I did some checking and it looks like the two outlets, even though they are in different rooms, are on the same circuit.  Unfortunately, we can't move them to different windows and the cord is only long enough to reach those outlets.

However, we can at least run one of them at a time with no problem, so it's not like it will be hot in the house.  Just need to call the electrician back out to do some more work (ugh, more $$).  Until then, we'll just cool the part we're in at the time.  There are a lot of home renovation projects I'll at least attempt to tackle, but electricity is something I don't want to mess with.  Sure I can put up a light fixture, change out a switch, or do something simple like that, but when it comes to circuits and rewiring, I'll leave that to the experts.  If I mess up the plumbing, I get wet.  If I don't lay the tile just right, it will just bug me every time I look at it.  If I paint something wrong, I can just paint over it.  But if I don't do the electricity just right, it could have serious, life altering consequences, LOL.

Anyway, we have them in, we know they work and we know they will completely cool down the house so this is but a mere hiccup in the road.  At least the next time I mow, I will have cold air when I come inside.

Wednesday, February 15, 2012

BATHROOM MIRROR HUNG


Finally got the bathroom mirror hung up.  Yet another things to scratch of our weekend "list".  The thing weighs a ton.  OK, not literally but it is heavy and was not easy to hang up (and get level at the same time).  We had hoped for a built in, but the "hole" that was already in the wall before was too shallow for the new ones they make now.  Until I can maybe someday find an old one, the hole will be covered by this one.  We think it fits the overall style of the room.  Simple, clean lines.  Now I'm on the lookout for a small shelf that we can mount, under the mirror and above that electrical outlet, for additional storage space of smaller items.

In the mirror reflection, you can see a few (more!) of the milk glass bud vases we have.  Once we are there on a regular basis, and have fresh flowers growing outside (or I just buy some at the grocery store on the way out), I want to put a flower in each one for a pop of color against the white.  That makes the flower the star instead of the vase.  More baby steps.

Wednesday, December 28, 2011

OLD DOORKNOBS FOR FUTURE PROJECT

Old Doorknobs
As we had the the work done at the house, these were the old "non functioning" doorknobs around the house.  None were original to the house, they had been replaced and added over the years and they didn't work.  They didn't fit most of the doors either.  So as we removed them, I put them aside.  I call it a collection for a future DIY project, but 2nd Man calls it borderline hoarding, LOL.

I don't know what I'm going to do with these, but I just can't bring myself to throw them away.  I think they would make a pretty awesome future project and would be a great way to re-purpose something that was in the house for decades already.  They just need to be cleaned up a bit.

 I'm thinking of some sort of long board, with these used as knobs to hang things on.  Perhaps as a towel rack for either the kitchen or the bathroom, or maybe a coat rack for the entryway?

Either way I'm keeping them, hoarder or not...ha.
 

Friday, December 2, 2011

FARMHOUSE EXTERIOR AT NIGHT

House at Night
When we were at the farm the other night, we realized it was the first time we were there at night since the major work had been done.  First thing, it's amazing how dark the country is at night.  And it's more amazing how different your house looks at night.  The next thing we realized when we drove up was "oops, it's so dark we can't see the front door!"  We had to use the car headlights pointed toward the house to see to get up the stairs.  We have a motion sensing light on the side of the house (and at the back) but I hadn't put the bulbs in yet because I want to make sure they go on and off before leaving the bulbs in (so they don't stay on all night when we're not there).

Porch at Night
Here is the new porch (well, new porch stairs and railing) and of course the new porch lights.  They really put out a lot of light.  So much so, that I felt like we were lighting up a stage for a production of 'down home country theater', ha.  I realized that I will need to add to the "TO DO" list.  Dimmer switches for the porch lights.  Something like this below:

Dimmer Switch
Should be easy and make for a nice way to control ambiance on the porch, bright for plays, dimmer for rocker relaxing.

As you can see however, the porch still needs it's makeover.  Until we have the stairs and railings painted, there isn't much we can do out there.  I do need to get all those paint cans into storage in the outside shed, just because they look too junky sitting there.  I'm thinking a rug or two and some furniture, hanging plants and potted plants, an American flag of course, and we'll be good to go.  We definitely need some curb appeal up there on the porch.
Although we're so far from the road, I don't know whose curb we're worried about appealing to!

We were kind of hoping for some stargazing as well, but alas, it was overcast that night.  It's OK though, we can save that for our first dinner out there.

Wednesday, November 23, 2011

NEW STAIRS ON THE END OF THE PORCH

I'm not sure I shared this part of the outside porch work we had done.  This is the end of the porch, by the front door.  This goes toward a different part of the property and we thought it would be a nice place for an additional set of stairs that wasn't there before.  


So this first picture above is what it looked like right after we closed on the house and I had started taking down the lattice and vines...


...and this is what it looked like when I was done clearing everything off and getting it ready for the work to be done.  Much more open and nice but still not quite finished...


...and this is what it looked like after all the porch railings and new stairs were put on.  We love it.  It really finishes things and we like that it leads right toward the "party tree".  Isn't this a much better view? 


Now we just need a cobblestone path similar to this meandering off in that direction...and of course the plants, and flowers, and well, all of it....ha.

Monday, November 21, 2011

FAUCET AERATOR SPRAYER

This is something I surprised 2nd Man with.  I know it sounds silly.  The sink is nice, since it's all one piece with the counter, but it's wide and narrow and it was hard to direct water around the sink to each corner and the sides.  So I found this aerator at the hardware store the other day and decided to get it, put it on, and try it out.

It's a stream in the up position and then a spray when you pull it downward. It made a HUGE difference.  It even has a green aspect to it by reducing water.  Best of all, it swivels 360 degrees and literally reaches every single square inch of the sink.  He loved it.  Anything that makes life easier is well worth it. If you haven't tried one of these, I recommend it.

Friday, November 18, 2011

NEW BATHROOM VANITY AND SINK

Bathroom Vanity and Sink Area Before
Here is the one and only bathroom...which you have seen from the other angle, but here is what we did last weekend.  While 2nd Man cleaned the floors (even though they are new, the workers tracked footprints all over as they were finishing up), I put the vanity together and mounted the sink.  It's not our first choice, we'd rather have a pedestal sink, but this one
looks like it fits and more importantly, gives us storage, which, in a small house such as this one, we need.
Bathroom sink and vanity after
Here it is finished.  There is of course a spot above it for a mirror and the vanity actually came with one.  However, when I took the previous mirror down for them to paint the wall, there was a piece of plastic covering the original hole of a medicine cabinet.  We've measured and it seems an odd size (probably an "old" size that's not so common anymore).  I'm going to keep looking for something that fits, but if we can't find one, we have another mirror that we saved from an antique dresser that would fit perfectly in that spot.  It even has that old farmhouse feel.

I'll share pictures, whichever way we go.

Glacier Bay Faucet
Here is a closeup of the faucet we chose.  It didn't come with one, I guess because they figure it's best to let people choose their own.  We chose this one from Glacier Bay that has a retro feel to it.  We love the ceramic handles with "Hot" and "Cold" on them.  My Grandparents had a sink with the same kind of handles, and I always thought that was so neat.  Now I have my own.
It feels like coming full circle!
 

Tuesday, November 1, 2011

MUDROOM SHELVING

Mudroom before shelving put in

Gorm shelving from Ikea, oh how I loathe thee...


This is one of those projects that looks simple when you see the finished picture in the catalog or the display sample in the showroom, but wow, it was anything BUT...  So, let me back up.  We have the above mudroom, empty as can be, new floors, and ready for shelving.  Ma (who lived there before) just had shelf brackets on the wall with shelves, which is fine I suppose, but it really doesn't take advantage of all the space there is in that room.  So flash forward to a visit to Ikea earlier this year where we saw their "GORM" line of heavy duty shelving.  Simple design not fancy, "easy" to assemble (cough cough), and best of all, affordable.

Gorm shelving before assembly
So we loaded up the back end of the Jeep on Saturday with shelves, a set of three, in the deepest size plus a corner unit.  Well, here they are all lined up nice and neat on the porch waiting to be assembled.  If only I knew the problems awaiting me, ha.  Putting together an individual unit was no problem.  I put together the first one, then the second.  Then I looked at the corner pieces and thought, "hmm, how do those fit onto the sides of each of the ones I already built?"  Oh wait, they don't, you have to build them IN PLACE.  Ugh.  So I moved them into the mudroom, and started.  This was on Saturday afternoon.  Oh and to make matters even more wonderful, Ikea no longer gives you the tool in the package to use so I had to make sure I had the right one.  The cordless drill I brought to make life easier did not have the exact size needed (standard, not metric) so it was slow going.  Sunday afternoon I continued and had to actually take apart what I had already done the day before.  Then it took two of us (three would have been better and easier) to hold the corner sections while you attached them to each side.  It was a project in physics to be sure.
FINALLY though, I got it all finished...and here is the result: 
Mudroom shelving finished!
You can see, in the photos above and below, the shelves really fill up the space and they give us LOTS of storage out there.
Closeup of the shelving
This is a closeup of the shelves.  They are very sturdy, and best of all, can be stained or painted, if you desire.  We decided to leave ours "au naturel" for now.  We like the contrast of the lighter wood with the darker wood walls.  I'd recommend these shelves if you have an Ikea near you, but you might want to rethink the corner section, ha.  They are great to use in a pantry, a mudroom such as ours, or a garage, basement, etc.

Still a little bit of room at the end
There is a little bit of space left on this end, and we'll probably add on a section of shelving at this end and also at the other end.  Since the house is small, we want to make sure we maximize all the available space for storage.


Our orchard rack I blogged about a few months ago will go in this room as well. That was one of the projects I didn't get to this weekend because these shelves took up so much of my time.  But the instructions seem pretty easy so I should put that together quickly this weekend.  Once we have that in place in the mudroom, it will let us see how much space we have for more shelving from Ikea.

Saturday, October 29, 2011

MASTER BEDROOM COMPLETE


Here is a view of the master bedroom looking back toward the closet and bath.  You can see the new white walls, the redone floor and just the overall brighter and lighter look...


Here is the angle toward the windows in the room, the window frames were redone as well.  You can catch a glimpse of the new half walls dividing the sitting area from the master bedroom.  


Here is the angle from the middle of the room looking toward the new area, a sitting area/reading area.  We had the new walls built and the support columns put inside the walls.  There was a center support that was removed. The new threshold was put it but at the time this photo was taken, it was not yet stained but that has been done now. 


Here is the area inside.  It's not huge, but big enough for some bookcases on each side, and a couple of big comfy chairs with ottomans.  Or chaise lounges?  Decisions decisions, ha.  We would like it to be a reading area, lots of light, and a nice place to sit and relax with a book in hand.

Friday, October 28, 2011

PART OF BATHROOM COMPLETE BEFORE AND AFTER


Here is part of the bathroom, after we took out the carpet that was in there and replaced the toilet with a new one...


...and here it is after, with the walls painted and the new flooring in.  So much brighter and cleaner looking.  This picture is just from one angle, I'll have to get one from the other angle (toward the sink) when I get the new vanity built and we hook up the sink.  That should happen this weekend.

GUEST ROOM COMPLETE PART 2


When I posted the guest room pictures earlier, I realized I should show you this.  There was a doorway from the guest room to the dining room, and we had that closed up. It looks like it's always been this way.

CLOSET LIGHT PULL CHAINS

Pull String Before
Pull Chain After
Sometimes, it's the little things. The closets had pull strings on the lights, so I went to the hardware store, and got a nice chain with a pull in a brushed nickel finish. A few dollar investment pays off and adds a little extra pizazz.  I had already put in the fluorescent bulbs I blogged about HERE, but of course didn't want to do this until they were done.  Each chain came in a package with the pull for just about $3 each as I recall.  About 5 minutes later, and all three closets have a bit cleaner look, not to mention a bit of retro style to them.  Looking back, I wonder if I should have gotten something in a bronze, considering the color of the hardware on the static closet door knobs, but for now, these will definitely be better than strings.

GUEST ROOM COMPLETE


This is the view looking into the guest room.  The floors in here were in a bit worse shape, they had some staining and discoloration, but since we weren't having the floors sanded completely, we just had it cleaned, stained and resealed.  They came out pretty good.  In this picture, for some reason the door frame looks like it's not white, but that's just a trick of the flash.


This room changed the most and also needed the most repair work.  There was a window unit in that set of windows in the above picture that had leaked, causing staining and water damage.  The window frames had never been painted either, just raw wood, and the closet doors wouldn't even shut with all the layers of paint on them.  Now they do!


Here is a view of the guest room looking into the bathroom.  There were a lot of baseboards replaced in this room as well.  He matched them up and now they look like they've always been there.

Wednesday, October 26, 2011

CHANGING OUT THE LIGHT FIXTURES


One of the things I did in the kitchen was replace the light fixtures and ceiling fan in the kitchen with our new halogen light fixtures.  This was the old light (nothing of collector value) so I told them not to worry about painting it when they did the ceiling.  You can see they took my advice, ha.


First thing I did was remove the old one and wire it all up correctly (wiring is not as scary as it seems, just make sure the breaker is off to be as safe as possible).  Black to black, white to white, hook up the ground, screw it to the mounting bracket and...


...here it is mounted, with the glass shades attached and halogen bulbs in place, just waiting for the final test...flipping the switch.  So we did and...


...let there be light!  I did it right!  We liked this fixture because each halogen can be directed to where we want it. For example, we pointed one toward the new yellow cabinet, one toward the future pegboard wall, one toward the marble table and one toward the end of the counter.  It really lights up the room and there is another one just like it at the other end of the kitchen where the ceiling fan was.  just forgot to get a picture of that one.

DINING ROOM WITH NEW TABLE


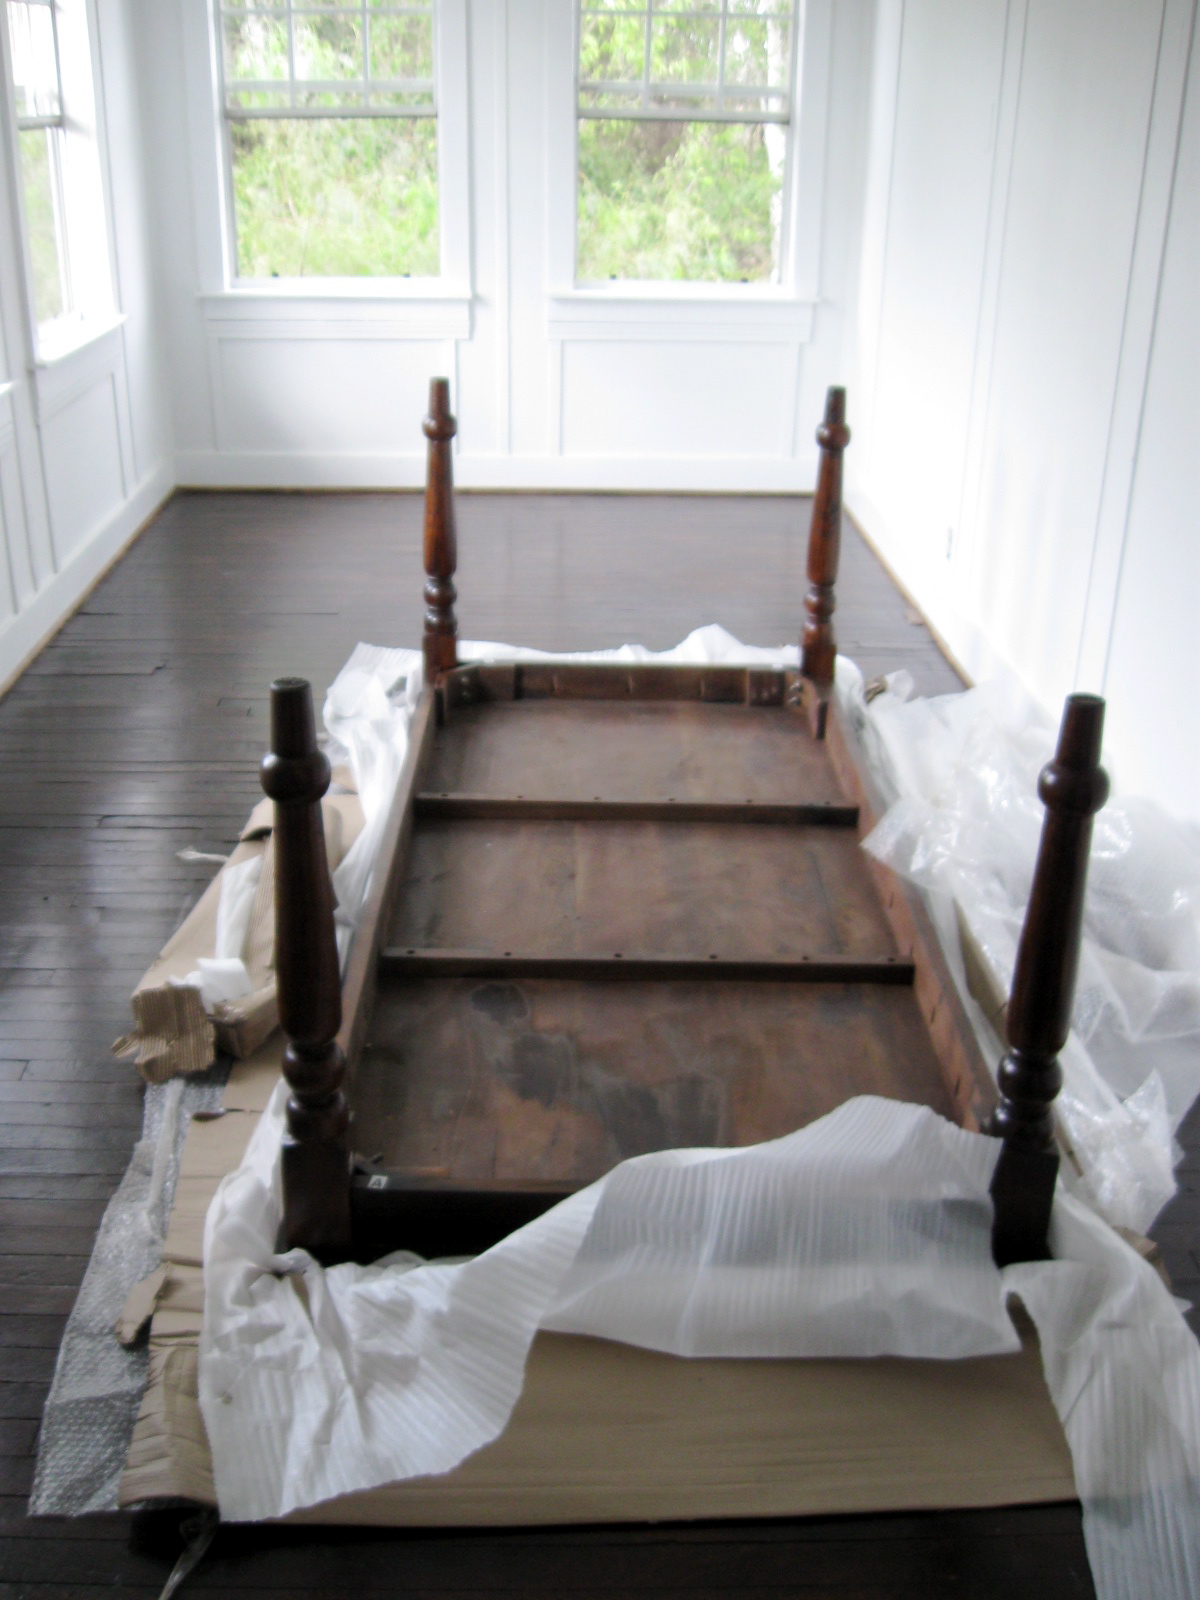
This is how we started, well actually, it was still wrapped in packaging.  The table is solid mango wood (sustainable, we love that part) but IT is VERY heavy.  It was all the two of us could do to get it flipped over.  But we did...


...and here it is in the room.  It really fits nicely.  The table seats eight, three on each side and one on each end.  Now we just need some chairs.  We aren't sure, now that it's in the space, what we want. Multi shaped chairs?  Different chairs of the same color?  Same chairs in different colors?  


It is almost the same color as the floor, it looks very nice.  Of course we can't decide if we want a large rug under it or not.  We go back and forth on that.  Whatever happens, we can't wait to eat our first dinner on it...after we get some chairs of course!