Sunday, March 31, 2019

WEATHER CHANGES AGAIN

Got to the farm yesterday and it was 77 degrees and overcast.  

I stopped and bought soil and compost and tried to get all the trees planted but the wind started blowing, the rains came and the temperature dropped to 56, all in about 30 minutes.

More of an update tomorrow. 

Until then...


...here are ducks from 2nd Family that came to visit recently.  We love having them come visit.  They are friendly, just walk around while we are busy doing whatever and at the end of the day, they go back home.  It's the best of both worlds, ha. 

Hope you are having a good weekend.  

2nd Man is baking an apple pie right now.  The apartment smells divine.

Friday, March 29, 2019

FRIDAY FUNNY

We saw this online the other day and thought we would share.


Of course it helps that we still both love watching The Wizard of Oz from time to time.  I guess kids nowadays don't get the magic of seeing it once a year as an "event" at Thanksgiving like when we were little.  I remember counting down the days until it was coming on.  

Anyway, yep, this is pretty accurate, keep an eye out during the watch, you never know what might be coming down the road.

Take shelter with the warning though because all hell is about to break loose, ha.  


Wednesday, March 27, 2019

GUESS WHAT DAY IT IS AGAIN

1st Man has a birthday!


Hi all this is 2nd Man posting today for 1st Man. I'm not as good on this blog stuff as he is so I will keep this short (oh and this weekend I will answer your replies to mine, thank you all).

For today, I want to wish him a happy birthday and thank him for all he does for us. He single-handedly keeps up the property at the farm. I know it is hot and long work and often difficult and at times frustrating but he's doing it for our future, and that means everything to me.

Love,

2nd Man

Tuesday, March 26, 2019

CITRUS TREE RAISED BEDS BUILT

So the other goal this weekend (other than mowing as I posted yesterday) was to get the three raised beds built for the citrus trees.  Building them is really the hardest part because they become unwieldy as they take shape.

Home Depot lumber
I started the morning (you may have seen this on our Instagram post) at Home Depot and got the boards I needed to do the project.  Love the smell of the lumber department, ha.  I get 8' long boards that are 12" x 2".  They offer free cuts so I have the boards cut in half.  That way two boards give me four pieces to make one 4x4 bed.

Six boards gave me twelve four foot long sections.  I loaded them in the Jeep and headed to the farm.


Here's a fun part.  The last couple of times I have built them, I used my cordless drills.  They work but half the time they aren't fully charged.  When I finally get them charged and use them, the torque is sometimes too much for them and the batteries run down quickly.  So I was thinking to myself that I wished I had a corded drill.  I got the wood unloaded and then I remembered that once upon a time, my Dad had an old drill that he called his standby.  I couldn't remember if we kept it or if it was given away somewhere along the way (he has been gone 17 years now).  I rifled around in his workbench  that I kept, nothing (except his cordless ones).  Then I remembered the bottom drawer of his large red tool cabinet was filled up with tools I hadn't gone through yet.  I opened it, dug around and found this!  

An old JC Penney drill.  

I plugged it in and it worked perfectly.
Thanks Dad!


The last time I built them, I did them on the porch because it was just easier on there I guess.  But then I had to carry them, fully completed, down the stairs and around to the back of the house.  They are heavy when built.  Very heavy.  Since we built those, the last time we had electrical work done, I had an outlet put on the backside of the house.  I almost forgot about it.  Woohoo, I loaded up my cart with the boards, the screws, the brackets and the drill and headed around to the back yard.


We had some extension cords from when we ran lights outside at the house in town to prevent freezing pipes a few years back and so I grabbed those and brought them with me.

Raised bed corner brackets
After I had everything together, I built the beds in the spots where they were going.  I was able to build them and just lay them over and it was done.  

The brackets make this process SO easy.  I never use the screws they come with, instead I buy a box of outdoor rated 'deck screws' so that they don't rust, etc. while out in the elements.

Here is the link to the type of brackets that I have bought on all the raised beds we have:


When I bought them, they were in the off season and the price was about $25 for a set of four (sale).  They are $35 now but maybe you can catch a sale on them.  Still not a bad deal if you consider the wood is the only other expense.
   

I put them in between the other beds, centering them between each row in both directions.  Three fit perfectly and I still have room to mow around them.  

By the way, don't judge me on the grass in the existing beds, ha.  It's actually the "straw" that I put down last Fall, somehow it sprouted!  It's not supposed to do that.  I guess I'm growing some sort of ground cover.  Lucky for me, it pulls up easily.  what you see in each bed are clumps that just pull right out of the soil.  I'm leaving them alone until I come up with an alternative to prevent weeds (thinking of weed block cloth with stones on top).

Raised beds for fruit trees
Here they are finished.  This was the hardest part.  The next part is to buy all the bags of soil to fill the beds.  I turn the soil underneath and smother it with cardboard and then fill with soil and plant the trees.  By the time the roots get down to the ground the soil should be starting to change and allow the roots to penetrate the clay.  The other trees have grown considerably over the last two years they've been in their beds so it's working well so far.

This coming weekend (weather permitting) will be the soil turning and cardboard and then the first weekend in April will be the trees going in.  We have a lemon, a lime and an orange on the porch, all three in full bloom.  Can't wait to get them in their new homes.


The upside now is that they will now be easy to water and with a power outlet nearby, we can string up lights if there is a freeze coming.

Monday, March 25, 2019

PRODUCTIVE SATURDAY

The day started off mostly clear.  It was cool which was nice.  I had several projects to do but started with mowing.  Just wanted to make sure I got that part done because next weekend looks to be rainy.


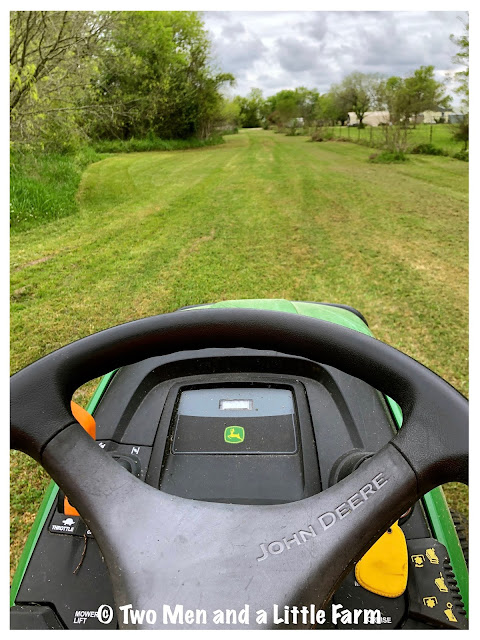
A view down the driveway as I mowed.  Now you can see why I call it my Zen Machine.  It's just so peaceful to be out there mowing.


It started getting darker.


But I finished.  Always a good feeling.


Clean and neat.

And it never rained.


I even created a few new paths from the still dormant winter growth.  I always walk the area with a stick to make sure no animals and no large stones or stumps and then I just slowly drive over it with the mower.  After two or three mows (consecutive) nothing grows back there and it stays clear with just grass year round.  This is a new path to the area we like to call the "secret garden" where I hope to plant a lot of colorful flowering plants (it's by the large huisache tree, more on that in an upcoming post).


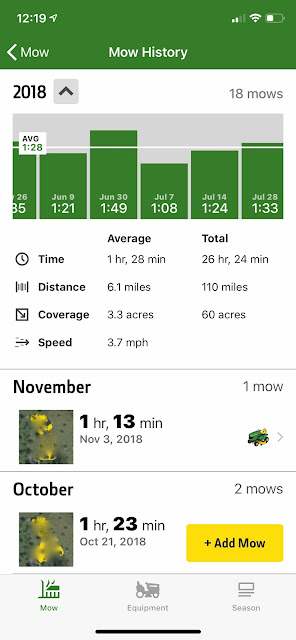
Here are the stats from my mowing app.  After the last mowing a couple of weeks ago being 2 hours, I'm back down to almost normal.  A normal mow is about an hour and a half.  I'm guessing the new "path" was the extra time. 

I also edged around the house the barn and shed and some of the fence line and as I was going to do the raised bed fruit trees, I ran out of the line for the weedeater. Sigh. Oh well, I'll work on that next time.


Dinner (Saturday night) was chicken and fettuccine Alfredo (after Friday's post, notice this was my plate, thigh and leg, ha).  I went back on Sunday and worked on another project.  More on that tomorrow.

EDIT: I had scheduled this to post Sunday morning but I put "PM" instead of "AM".  Oops. So it posted late yesterday but because there wasn't much traffic, I'm going to repost it today and then I will update tomorrow with the other part of the weekend.  

Hope you had a great weekend!

Friday, March 22, 2019

THE GREAT CHICKEN DEBATE


We saw this online the other day and it sparked debate in our household.  2nd Man likes white meat the best, the breast and the wing.  His least favorite part is the thigh.

I on the other hand love the dark meat.  Thighs are my absolute favorite, to me it's the perfect piece of chicken with the most flavor.  He will eat thigh meat if it's chopped up and included in a recipe but just fried chicken?  Nope.  The thighs he leaves for me.  I'm fine with that.  I leave the wings for him.  

SO good readers, what part of the chicken is YOUR favorite?

Thursday, March 21, 2019

SHRIMP BOIL SHEET PAN RECIPE

This sheet pan recipe comes from Tasty.co (we love those videos that we see everywhere on social media).  I changed it up just a bit.

When I made it a couple of weeks ago for dinner after work and it was ready when 2nd Man got home.  In the blast of a cold evening we both said this was like having a Summer dinner in Winter.

Ingredients after these step by step photos:

Sheet pan shrimp boil
Here are the ingredients...shrimp, Old Bay seasoning, corn, onion, red potatoes, garlic, Andouille sausage, butter, lemon, parsley.

Chopping the ingredients
Chop the onions, mince the garlic, shrimp should be peeled and deveined (I bought them already deveined, so I only had to peel them), slice the sausage, and cut the corn into pieces. 

Boiling red potatoes
Boil the potatoes for 7 minutes in water.

While they are boiling...

Butter, Old Bay, and garlic 
Melt the butter in the microwave, add the garlic and the Old Bay, stir and set aside.

Boiling corn and potatoes
After the seven minutes of boiling the potatoes, add the corn (and a little sugar, per Colleen's suggestion) and boil for three minutes longer.  What this does is par cook the two ingredients that would take the longest to cook.  At the end of the ten minutes total, take them off the heat and drain them...


Put them out onto the baking sheet and add the sausage, onions and shrimp.  Pour the butter sauce over all and toss to combine.


Bake in a 400 degree oven for about 15 minutes or until shrimp are pink and corn is tender.

Sprinkle with chopped parsley and a few squeezes of lemon and plate it up.  

Sheet pan shrimp boil with corn, potatoes and sausage
It's SO good and tastes just like the best shrimp boil you'd have in July or August, but instead of boiling a giant pot of water outside over the fire or grill, you can whip this up in about 30 minutes, prep to table, when you get home from work.  It also works well to prep everything the night before and then all you have to do the next day is make the sauce (you want it fresh) and toss it all together.

Ingredients:
  • 1 lb of small red new potatoes
  • 3 ears of corn, cut into pieces (3 or 4 each, depending on length of ear)
  • 1 medium onion, chopped into chunks
  • 1/4 cup unsalted butter, melted
  • 5 cloves of garlic, minced
  • 1 1/2 TBSP Old Bay seasoning
  • 1 lb of shrimp, peeled and deveined
  • 1 lb of Andouille sausage, sliced into pieces
  • 2 TBSP chopped fresh parsley
  • 1 lemon, cut into wedges


Enjoy!

Monday, March 18, 2019

APP FOR MOWING

When I posted last week about mowing and included a track of my mowing stats, several of you asked about the app both in comments and via email to us.  I realized I had never shared this on the blog.  It's an awesome app and I love having it.


It's called MowerPlus in the App Store.  It's free which is even better, ha.  Now bear in mind, it's designed for and is branded "John Deere" but it's not tied to your mower, it really just works with your phone which you have to carry on you while you mow the yard.  I keep mine in my shirt pocket because I'm usually listening to music on my earphones.


As you can see here on the app home page, it shows the weather for your location which is nice.  It also shows how long since your last mow and how much rain has fallen since the last mow (at the rain station the weather app uses of course).

It also tells you at the top "today looks like a good day to mow", ha!  What you do is when you get on your mower, you start up the app and touch the "mow now" button and it counts down ten seconds...


 ...then it uses the GPS on your phone to track you while you mow (since you have the phone with you while you are on the mower).  This is why really, even if you don't have a John Deere, it will work using whatever mower you have.  It will track all sorts of stats and then compile all of them into the app and create a really nice history of your mowing.  

Above are a couple of screen grabs of mine.  You can toggle by year, see all the months and then within the month see how many mows that month had and the length.  Then when you click on a specific mow...

...you get the details for that particular mow.  For example, on the left above is a mow from last June.  I mowed on June 30, it took me 1 hr and 49 minutes, I covered the equivalent of 7.2 miles, 3.9 acres and had an average speed of 3.5 mph.  There is a pause button for breaks of course if you have to stop.  Oh and the picture portion at the top?  It's a google satellite view of where you mowed with an ANIMATED path showing everywhere you mowed in your yard.  I blurred it out for our privacy of course but it's really neat to see all the paths you mowed around.

The other screen shot is a stat to keep track of how many hours are on your mower engine and if you have a Deere, it reminds you when it's time for various maintenance items on your particular model.  You can tap on the maintenance section and keep track of oil changes, etc.


There may be other apps for mowing, but this one is pretty neat and useful.  Of course since we have a Deere, it works all the way around for us.  I've been using this for about 3 seasons now and it's nice to compare previous years and see how weather changes mowing habits, if things take longer in certain months, etc. 

Hope this helps someone!

Saturday, March 16, 2019

GUESS WHAT DAY IT IS


2nd Man has a birthday!!!!!


CELEBRATE GOOD TIMES, COME ON!

Yep, he's 50-something years young today. We're off to run errands and just make it up as we go along...those are the best days aren't they?

Love you!

Will check in later tonight!


Friday, March 15, 2019

END TABLE TRASH TO TREASURE

Regular readers know that I have a favorite place to look for bargains...our downstairs trash area!  Our building has trash chutes on every floor and they feed into a separate room, but for boxes and other things that people can't put in the chute, there is an area (indoor) near the loading dock, where people can put the things they don't want.  

I've found several cool items so far.
Here is the latest!


So I went downstairs as usual, on the hunt for anything good.  I found this.

Someone put this small table with a sign that said "free".  If it had been particle board or something similar, I would have ignored it.  But this is a solid wood end table (I think it's oak) and it is very sturdy.  There is nothing wrong with it other than a few superficial scratches. Oh and it has some sort of hook mounted to the side. 

The wood is in great condition and would be easily ready for some primer and paint after some sanding.   Or maybe a fresh stain after some sanding.  Since I'm (hopefully) going to have a bit more free time this year without worrying so much about the house and the flowerbeds around it (since the house will mostly likely be replaced in the next two years), I'd like to begin enjoying my barn/workshop and start doing some projects like painting, refinishing some things, building a few items, etc.   

Now, what to do to THIS to make it something fun and cool...?  Decisions, decisions.


Wednesday, March 13, 2019

STOVETOP MAC AND CHEESE RECIPE

Leaving this post up another day...

OK, sorry for delay.  At long last here is the stove top mac and cheese recipe we use.  It's not entirely ours, we found it online a while ago (Martha Stewart?) but we have tweaked it and adjusted over time.  It's a permanent addition to our recipe box now!

Cheese for mac and cheese
It takes three kinds of cheese.  Nothing like the ones that have five or six or even eight kinds and you have to break the bank buying exotic cheeses.  This comes out just like old fashioned simple creamy mac and cheese.  This is American yellow cheese (from the deli, not Velveeta), Parmesan and sharp cheddar.

Mac and cheese ingredients
Here are the other ingredients (amounts listed at end of post).  Mustard powder, milk, 1 lb dried pasta, butter, and flour, along with the cheeses shredded up (to make them melt easier and quicker).

Here is where I missed a photo (and the reason I had held off on posting but darn if I didn't forget again the last time we made it, ha). 


(next time we make this, I'll take a picture of this step and add it to this spot in the post)

Over medium heat, add butter and let it melt.  As soon as it starts to foam, add flour and whisk it until slightly darkened (about 2 minutes).  Add the mustard powder and whisk again to combine.

Slowly whisk in warmed milk.  You can warm the milk in the microwave for about 2 or 3 minutes.  It helps it come to temperature in the pan much quicker.


Heat the milk to boiling and then reduce heat to medium low and cook, stirring often until it is thick enough to coat a spoon.  This takes about 4 minutes.

Boiling pasta
Boil the pasta according to package directions and after it is done, drain and set aside but keep about one cup of pasta water in case you need to thin it down when it is all done.

*you should always do this with any pasta sauce to give you a back up way to thin sauces that are too thick.  An easy way to add some starchy thickening.  

Adding American cheese
Turn the heat down to low/simmer and add the cheese in batches.  First up, the American cheese.  Stir until melted into sauce...

Adding sharp cheddar
Add the sharp cheddar next and stir until melted and incorporated as well...

Adding Parmesan
Lastly, add the Parmesan and stir it until melted...


Add the cooked and drained pasta and stir...


Add salt and pepper to taste.  At this point you could also modify it any way you desire, red pepper flakes, garlic powder, etc.  Whatever flavors you like.  We keep ours just old school mac and cheese. 

Old fashioned stove top mac and cheese
Stir to combine it all.  If it seems too thick, you can add a bit of the reserved pasta water to loosen it up. This also works if it has to sit for a bit while other food is prepared.

Macaroni and cheese
Here it is on the plate.  It's just so creamy and tastes like a good old fashioned macaroni and cheese.

Ingredients:

  • 1 lb pasta 
  • 4 TBSP butter
  • 1/4 cup flour
  • 2 tsp mustard powder
  • 3 cups whole milk, warmed
  • 1 cup (4 ounces) American cheese (chopped)
  • 1 cup Parmesan cheese (grated)
  • 2 cups (8 ounces) sharp cheddar (grated)
  • Salt/pepper/other spices to taste
See step by step instructions in photos above.

Enjoy!