Friday, September 29, 2017

KITCHEN TOWELS FOR THE FARM

Anyone who has followed the blog for a bit knows that I have an obsession interest in towels and potholder with cool themes for the farm.  I've found them with farm animals, farm objects, even gardening and canning references.

Farm towels and potholders
2nd Man would probably say "how many do we need?"  Well a couple here, a couple there, it's all good, right?  I found these at Kroger, in their housewares department.  I just couldn't resist the "cluck/oink/moo" theme.  As an added bonus, they were 75% off so I bought two towels and two potholders (which adds "baa" to the farm sounds, ha) for the regular price of one.  

Storage bench
We have the perfect space for them. This bench is in the kitchen, I blogged about it a couple of years ago when we got it.  It's completely sealed tight around the base and the top lid is so heavy it is mouse proof. It's where we keep all the towels and linens for the kitchen.  

And best of all?  We still have room for more, ha!


Thursday, September 28, 2017

LIGHTS OVER OUTDOOR TABLE INSPIRATION THURSDAY


Every Thursday we like to post a picture of something we've found online that inspires us to do something similar at the farm. Sort of our own blog bulletin board so that we can eventually look back and someday, hopefully anyway, recreate it...enjoy!

Outdoor lighting, image via Pinterest
Always on the lookout for outdoor lighting ideas, especially around seating/dining areas we might come up with later on.  We kind of like this.  Concrete with timber in it (we have enough of that around the property) and then using it to have lights strung from.  You could do four and have it going multiple directions, just two like this, or even one as a base and put the lights up into the tree starting from the post point.  Best part is it is movable as needed.

Of course we LOVE that table too, so rustic and neat looking.  But anyway, this is what it is, an idea for us to save for later on down the road.  

Be inspired!


Wednesday, September 27, 2017

STORING CANNING JAR RINGS AND LIDS

Since it was still hot and humid outside, it was a good time to do some things inside.  One thing is since I cleaned up all the clutter last year, it was time to start organizing.  

One thing we had was a box or two full of random canning jar rings and lids.


Recently, I found these large "decorative" Mason jar storage jars. I believe they were most likely made as canisters for the kitchen but I had a different use for them in mind.  

Mason Jar storage jars
I figured they would make the perfect storage for that mess of lids and rings!

Canning jar lids stored in jar
Since the lids take up less volume, I used the shorter one...they fit perfectly.

Canning jar rings stored in jar
The taller one is perfect for the rings.  
They also fit perfectly! 

Now they can sit on the shelves in the mudroom and look nice while functioning as easy and quick accessibility to canning supplies.  

Never hurts to be organized AND pretty at the same time, right? 

Monday, September 25, 2017

STILL TOO HOT NOT MUCH DONE

It's just still so hot.  Got up to 93 at the farm Saturday. There was nothing to do in the garden, I didn't mow, so I spent the day weeding the flower beds, doing a few inside projects (details upcoming in future posts), cleaning up part of the porch, and of course watering everything.  


Most of the lantana bounced back from the flood...


I said most because one of them didn't make it so I pulled it up.  Need to find another one for this spot since we're assuming there will not be another flood this season!


But the pentas made it through just fine and they are all covered in blooms and getting bigger.  


These sprung up at random along the fence of the garden (not sure what they are, a vining weed of some sort).  Anywhere else on the property and we might just leave them but...


...they are creeping into the garden and we can't have that.  So I pulled it up (as much as I could).  I'm sure it will be back though, aren't they always? 

Lemongrass
The two lemongrass plants are growing like crazy.  I've already trimmed them twice.  Question for all of you out there.  When we've bought lemongrass in the store, it's more of a thick stalk, almost like celery.

Do we just keep it growing like this or stop trimming it completely? 

We wonder at what point does it get thick like you see in the store?

Saturday, September 23, 2017

FIRST FALL DAY AT THE FARM


Well, yesterday was supposedly the first day of Fall (side note, we love the word Autumn but it's so rarely used).  I'm sure it is nice for many of you all around the country but for us...


...it's far from it.  

91 today?  Ugh.  That's why Fall gardening is so tricky in these parts.  Many veggies need those cool temps and the weather here can trick you into thinking it's Fall when it's really still Summer. So today the plan is to not mow (hoping it hasn't grown much since last weekend) and all I'll have to do is edge.  Then I'm going to work on the irrigation for the Fall garden and lastly water the trees and flowerbeds.  In this heat and still humidity, that's about it for the weekend, hopefully the last HOT weekend for awhile, but we'll have to wait and see. 

They say we might have season's first cold (cool?) front next week (the reason for rain in the forecast) and next weekend will be cool.  We'll see... 

More later, off to the farm as this posts. We hope your weekend is off to a cooler start!

Friday, September 22, 2017

BABY DUCKS OF THE ECLIPSE

OK....so here is a farm story that got delayed after the events of Hurricane Harvey.  On Wednesday after the eclipse (and 3 days before the Harvey disaster), "J" from 2nd Family emailed me this photo.

SURPRISE!

She said that on the day of the eclipse... 


...one of their ducks came out from under the house...with eight little ducklings following along behind her!  They didn't realize she had laid eggs under there since she has randomly laid eggs around the property, and they were always unfertilized. She started to disappear for long periods of time, they thought she was flying up into a tree where she liked to roost.  Instead, she was apparently scooting in through some bushes at the back of the house and there, hidden from view (and safe), she did her thing and hatched these adorable babies.


A few days later she sent another couple of pictures.  Mom and babies are doing fine...


...though they are going to need a bigger pond, LOL!  

"J" said the ducklings LOVED the flooded yard for a few days, splashing around and swimming all over the place.  They were probably really confused when the water receded.  

They haven't decided what to do with them since they were not expecting eight new babies and aren't prepared for ten ducks roaming around. For now though, they are fine to stay there where 2nd Family can keep them covered and safe from airborne predators and they can enjoy the adorable cuteness of ducklings. If we were living out there full time, we might have become duck keepers.  2nd Man loves baking with duck eggs!  

They may end up keeping a couple of them and so we picked out two perfect names for them if they do:

SOL and LUNA...


Thursday, September 21, 2017

TREE SWING PLATFORM, INSPIRATION THURSDAY


Every Thursday we like to post a picture of something we've found online that inspires us to do something similar at the farm. Sort of our own blog bulletin board so that we can eventually look back and someday, hopefully anyway, recreate it...enjoy!


OK, every once in awhile, we just have to go out on a limb (literally in this case) and find something that's just plain neat, setting aside the point that we might not ever get to make something like it. At least not in the near term and this is one of those things. This tree swing bed/couch is so awesome.  Wouldn't it be fun to just lay/sit on there and just gently swing back and forth in a breeze?

Do we have a tree this would work on?  Yes.  Do we have the other items?  No, not really.  Well maybe some wood and the tools of course, but hey, that's what inspiration is about, right?  Let's just save images of the things we like and then figure out a way to do it later on.

Be inspired!

Wednesday, September 20, 2017

FIRST ALERT ATOM SMOKE AND FIRE ALARM

One thing that we recently realized we never got for the farmhouse was a smoke detector (or two).  Very important to have in ALL homes and now that we spend the night out there more often than we used to, we definitely need them.  

So a couple weeks ago, we were watching HSN.com and they had a great deal on a really powerful little smoke/fire alarm.  


First Alert ATOM smoke detectors
There was a special deal, a set of four of them for one low price with free shipping.  Couldn't pass that up!  Of course they also sell them on Amazon, you can click here First Alert ATOM Smoke Alarm to read about them.

A CO2 detector is important to have if you have a furnace or appliances that could generate that.  We are all 100% electric so no worries there.


They are tiny little things to be sure, but big things do often come in small packages.  These are photoelectric and can detect smoldering fires long before regular smoke detectors.  And of course it's by First Alert who has been making smoke detectors since about forever.  

Another thing we liked about them is the fact that they are small and unobtrusive.  With the low ceilings at the farm, it's nice to have something that kind of disappears into the ceiling. 


We're putting one in each bedroom, one near the foyer in the living room and one in the dining room off the kitchen.  It might be overkill in such a small house but hey, safety is safety and we got four in the package so...overkill it is!  Safety first!  

Good time here to do a public service and remind everyone to check the batteries in your smoke detectors and make sure they work. 
   

Monday, September 18, 2017

UNVEILING A NEW AREA


One of the things we're trying to do now is every year, we want to clear a new area on the property.  It could be a new permanent trail or widening an existing green space.  I don't always blog about it because progress from week to week can be slow and just showing a picture of a few feet of clearing is not that exciting, ha. These can take a few months depending on weather and other projects so we'd rather unveil it when all the hard part is done.

Here is (was!) this season's project:

Overgrown area before
It is an area with trees that we really wanted to clean up because it was so overgrown.  It's one of the few spots on the property (at least that we can get to) that has "regular" trees, no mesquites.  Mesquite trees are nice but they have thorns and they don't grow up straight and tall to create a shady area that you can walk under (at least not for a LOT of years).  It's hard to tell how overgrown it was in this photo but it was...and we saw its potential.  

The photo above was from last year.  


So I started clearing as I had time.  Sometimes I mowed around it if I could, taking a little bit more each time around on the mower.


Or THROUGH it, if I could do that.


Clearing the property
And I would slowly make progress.


Other times, I had to put on the boots and then dig around with (gloved) hands and take out all the discarded junk that was there from years past.  


All of this (and more) was in that patch above.  Concrete pieces, old power tools and metal poles.  Can't mow over those things at ALL.  Someone who lived there temporarily before us discovered that an overgrown area was a great place for dumping their "out of sight out of mind" objects. 

For us, not such a great place...it was more work.


Still other areas, like this after mowing, required me to get off the mower and grab a machete and some hedge clippers.


But slowly we saw progress, week after week...


And our space got bigger and bigger...


And in all directions...

Clearing brush before
Here's a great before and after set of pictures.  The above was before, about mid April.

Clearing brush after
This was this past weekend, after.  
Same spot, same angle.  

All clear!


And here it is looking at it from behind the house.


Here is another before and after.  Above is the before when I had cleared about half of it (June-ish)...


...and here is the after, from the same angle.  Not too bad for some part time weekend work on top of everything else we have to do out there.  It makes us happy to see progress like this, no matter how small. More happens than you might realize when I start going crazy with the mower, some tools, and have a little time on my hands, ha!

With the manual labor in this spot more or less done, now comes the most important part...the fun part.  It's all cleaned up and cleared and we have a WHOLE NEW spot to plan things for next year (or maybe later this Fall).

Shade loving plants?
A bird haven/sanctuary?
A spot for an "outdoor room", maybe a living room of sorts with chairs to relax in?

Time to dust off those "Inspiration Thursday" posts that we put up for this very reason.  One thing is for sure, we have our very own mini-forest now, ha!

TIME FOR PLANNING!

Sunday, September 17, 2017

VAMPIRE EGGPLANT

Was at the garden center yesterday, saw this and it made me laugh...


I'll never look at eggplant the same way again...LOL!

We're off to a local restaurant this morning for a wonderful all you can eat brunch. Hey, at least 2nd Man gets the day off from cooking, ha.  Update later!

Hope you are having a great weekend!


Friday, September 15, 2017

A RABBIT COMES TO VISIT

Bunnies galore!

As I was mowing recently, they appeared randomly all over the property. Of course the mower scared them off before I could get a picture but as I was putting things up the last time, this little guy or gal stopped to check things out.  

I slowly grabbed the camera and snapped a few pictures. Thought I'd share!


"Hey there, I'm ready for my closeup!"


"Hey, wait, what's that over there?"


"Gotta go, bye, see ya later!"

We have also seen some baby bunnies around as well. We tend to think of Spring as the time for baby bunnies but I guess you can't stop a rabbit from, um, doing what rabbits do.  

Hope you enjoyed the bunny visit! 


Wednesday, September 13, 2017

SOUTHERN CHOCOLATE COBBLER RECIPE

Here is a recipe we've been doing for years.  I think my Mom gave me the recipe originally and she got it from newspaper somewhere.  We can't tell you how delicious it is, not to mention an unusual dessert to serve your guests. 

Pear cobbler, apple cobbler, berry cobbler, sure, but chocolate cobbler?  Oh yes...


Here are the ingredients:

1 1/4 cups sugar
1 1/2 cups self rising flour
3/4 cup milk
2 sticks unsalted butter (we used 1 once and it came out just fine, if you want to use less)
1 tsp vanilla extract

AND THEN

1 cup sugar
6 Tbsp cocoa powder
2 cups boiling water


In one bowl, mix together the first batch of ingredients, sugar (1 1/4 cups), milk, flour and vanilla until blended... 


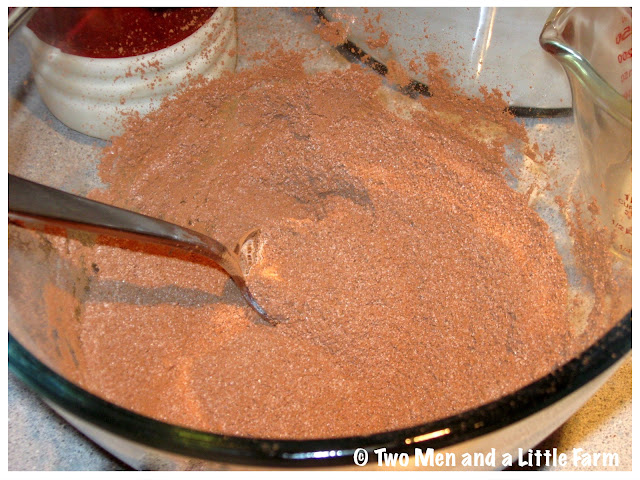
In another bowl, mix together the second group of ingredients, the sugar (the other 1 cup) and cocoa powder...


Meanwhile, preheat the oven to 350 degrees.  Put the two sticks of butter in a 9x13 baking pan and place it in the oven while it is preheating so that the butter is fully melted.


Once the butter is melted, take the hot pan out of the oven (be careful) and immediately pour in the wet ingredient batter.  DO NOT STIR.  That's right, don't stir.  It will bubble up around the edges...


On top of that, sprinkle the dry ingredients across the wet batter mixture.  You DO NOT STIR this either...


Gently pour the 2 cups of boiling water over the top of all and once again (yep) DON'T STIR.

Place back in the oven and bake at 350 degrees for 30 to 45 minutes. We bake until the top crust is a beautiful golden color.  Each oven will vary so keep an eye on it.  Start checking around 30 minutes.

Baking chocolate cobbler
This is what it looks like when you take it out of the oven.  Magic has happened!  It has flipped and the crust and dough are on the top and the chocolate and sugar mixture has mixed with the butter and become a rich chocolate sauce on the bottom.

Let it cool for a bit and then dish it out...


Chocolate Cobbler
Here it is in all it's scrumptious glory.  It's oozy and tender and buttery and chocolaty.  You can serve with ice cream or whipped cream or a big glass of milk. We dare you to eat just one piece!

Enjoy!