Friday, August 12, 2011

SWEET AND SAVORY BRISKET SLOW COOKER RECIPE

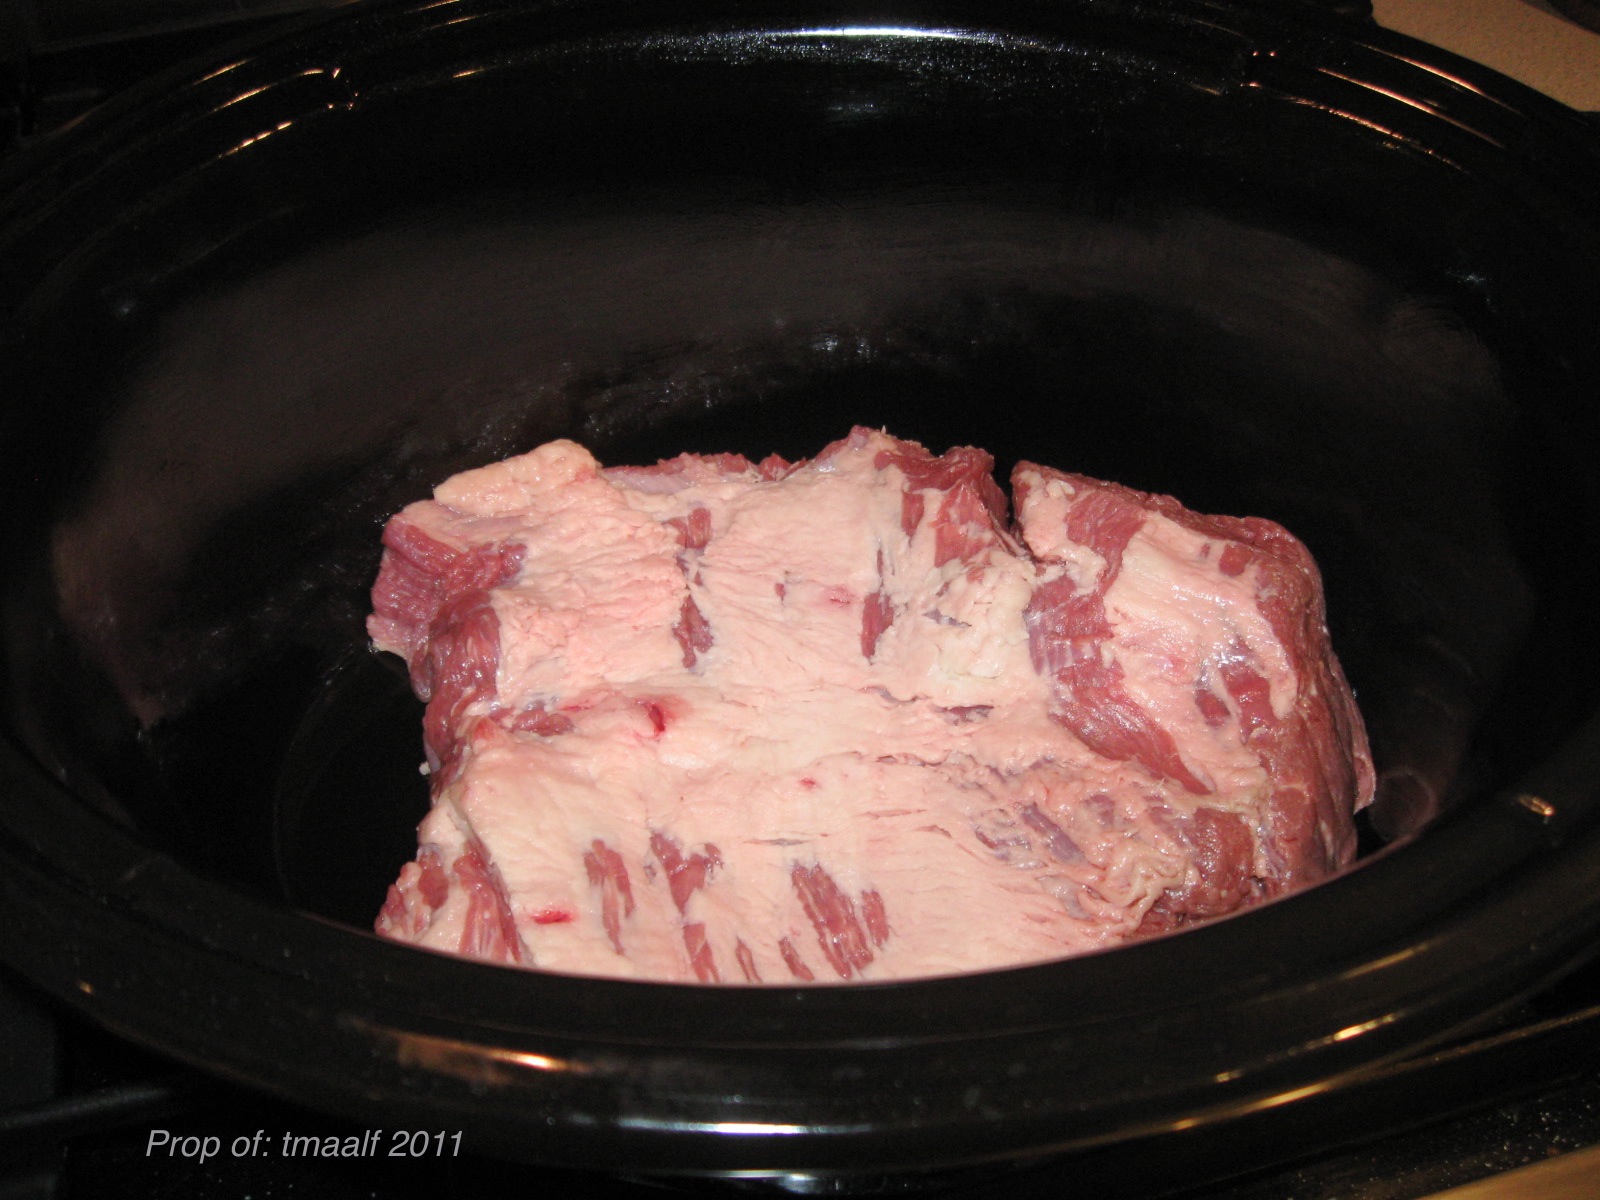
Well, this was our second use of the slow cooker and boy was it delicious! Found this recipe in an old cookbook that my mother had.  Very simple ingredients and minimal prep work.  In fact, I prepared it before bed the night before, took it out while getting ready for work so it would warm up to room temperature, popped the crock into the slow cooker base, set the timer and went to work.


Ketchup, onion soup mix and jelly, ready for heating

Sauce after it's heated and ready

First half of brisket in bottom of crock pot

1/2 of sauce poured over first piece of brisket

Second 1/2 of sauce on second piece of brisket ready to cook

Brisket after cooking for 8 hours.
INGREDIENTS:

3 1/2 - 4 lb beef brisket, cut in half
1/3 cup of grape or plum jelly
1 cup of ketchup
1 packet of onion soup mix
3/4 tsp of ground pepper

Lightly oil the bottom and sides of the crock pot (olive oil spray works best).
Mix jelly, ketchup, soup mix and pepper in small sauce pan, heating on low just until jelly melts and it's all mixed together.
Put one half of the brisket on the bottom of the crock pot, pour 1/2 the sauce mixture over the brisket.
Place the other half of the brisket on top of this.  Then pour remaining sauce over the top.
Put lid on, and cook on low for 8-9 hours.

It made quite a bit of liquid, much of it from the fat in the meat, but we used a fat separator and got some of the good sauce out to pour over the sliced pieces.  It was falling apart, fork tender.
We served it very simply with some potato salad and our favorite Vinho Verde wine.
Simple, quick, easy, and delicious!

Enjoy!

Thursday, August 11, 2011

INSPIRATION THURSDAY

Pretty flowers in a naturalized kind of settting

Once again, just pretty flowers, lots of color, and a kind of
naturalized looking landscape.

Enjoy, and I'll see you tomorrow.

Wednesday, August 10, 2011

PAINTER UPDATE


Well, we got the estimate.  It's considerably more than we wanted to spend, but looking at all the work involved and how much he's actually going to do, we're thinking that having a "new" interior, fresh and clean and ready to go is worth the cost of good quality work.  So I believe we are going to move forward this week.  It's possible that by Labor Day, it will be done, at least on the inside!  We have to remind ourselves, there is no deadline, we do it as we can.  Someday soon though, it will all be done and look amazing and we'll look back on all this and laugh...   

MASON JAR SEWING KIT

Some of you may not know this, but I have a fascination with jars!  Ha!


We use jars in our pantry to keep most of our bulk ingredients in
(pantry pics coming in a future post) and jars in the laundry room for sponges and washcloths and things like that, and of course I've been posting some cool ideas for using Mason jars (and other type canning jars).


I saw this idea in Martha Stewart Living magazine a couple of years ago, and always thought it would be such a neat way to keep sewing supplies around the house, or to give as a gift for someone who sews.
Mason Jar Sewing Kit, photo courtesy of Martha Stewart.com
Granted we don't do a lot of sewing around the house, but we do have the occasional button that needs to be put back on a shirt (darn dry cleaners!), or a hem that needs to be fixed, and thankfully, my Mom taught me how to do those simple tasks (everyone should be able to do that).

 --------- If you would like the official instructions for this, click HERE ---------
Jar as pin cushion
Above is another one that seems to be a smaller version, showing you can use different sizes to make different kinds of jar kits.  This one is more of a pin cusion jar, maybe just keep pins and safety pins in the jar instead of spools of thread and scissors...still very neat.

Anyway, this was just too cool to not blog about it.  When I make one for our farmhouse, I'll be sure and post the details and of course, pictures of the finished product.

Hope it looks as good as Martha's!

Tuesday, August 9, 2011

THE GROUND IS CRACKING FROM THE HEAT / DROUGHT

No, this isn't concrete...
This is how bad our drought is here...the ground is literally
cracking open.  This is in several spots in the yard at the farm....


I'm just waiting for the Earth to open up and swallow us all, ha!
We need rain!  Did I mention we need rain?  

OUR FAVORITE SPARKLING RED: BLACK CHOOK SHIRAZ

Here is another of our favorites, this time it's an unusual sparkling wine, a sparkling red!

A couple of years ago, we attended a wine tasting at our favorite local wine bar in Houston, Sonoma.  One of the wines we tasted was a sparkling Shiraz from Australia.


We loved it.  It is sweet, juicy, fizzy, and has a strong flavor of berries.
This is from Australian, a winery called Penny's Hill.  It's very bubbly, just like Champagne.

During Hurricane Ike a few months later, we found a bottle at a local store that was still open.  We bought a bottle and used it to celebrate when the power came back on (2 weeks later!).

Later we bought 3 bottles online and have slowly used them for special occasions.  One bottle we had at Thanksgiving and it was delicious with turkey and dressing, and another bottle we used for a birthday celebration.  We still have one bottle left, which we're saving for our first dinner at the farm.

Syrah Grape
It is made from the Syrah grape shown above.

Here are the official winemaker notes:

This non-vintage wine sparkles to the tune of a well blended, predominately 3 year old Shiraz, aged in old French oak barrels showing wonderful smooth integrated fruit and a rich weighty texture across the palate.  This is blended with a touch of younger Shiraz bringing ripe juicy fruit character to the finished product.  A rich, luscious sparkling wine that is well balance and food friendly.

So pick up a bottle of this and enjoy it on your special occasion.

Monday, August 8, 2011

CHIPOTLE MAYO SPREAD RECIPE

Just discovered this a few months ago and it's one of our favorite "condiments" now.
It's great as a spread on burgers, or as a dipping sauce for pretty much anything
(like the fries in this photo)

Chipotle Mayo Spread
INGREDIENTS:

1 cup mayonnaise
2 chipotle peppers from canned chipotles in adobo sauce
1 Tbsp adobo sauce (more for spicy, less for mild)
1/4 tsp garlic powder (not salt)
salt and pepper to taste

It's really just a matter of mixing it all together at this point.  You have two options;
You can blend it all in a blender/food processor, or you can mince the peppers with a knife and then mix it all together by stirring vigorously in a bowl.
If you choose the blender, blend for about 10 to 15 seconds, if you over blend it, it will become too watery, so be careful.

We like the hand mincing method the best because we like the small pieces in the sauce.

Enjoy!

WE THINK WE HAVE A NAME FOR OUR FARM!

As many of you following this blog know, we've been trying to come up with a name.   After all, every farm needs a name.  Well, we believe we've finally come up with one.

It's funny, it sounds exotic but has a great story behind it, and I think it "fits" with our experience so far.

We are currently researching it, checking domain name possibilities, testing logos, etc.  We want something that we can brand ourselves with, using it for labels on possible future merchandise, an Etsy store for selling homemade stuff, perhaps even a sign at the end of the driveway.


CHECK BACK ON MONDAY THE 15TH, WE'LL HAVE THE REVEAL!

CONVERTING A SMALL PANTRY INTO...

What to do?  What to do?
Here is a picture of the small pantry in the farmhouse kitchen.  On the left, before, when Ma lived there and it was full, and then on the right, after we emptied it out.


Click on the photos to enlarge.  

Ma used this as her kitchen pantry, as it's right at the end of the wall where the stove is.  Since we'll be using the mudroom as the main pantry, we've kind of got this as a "freebie" storage space.

There are several thoughts.  Or course, the obvious, a second pantry, again.  But then we're thinking of what other uses for that space.

DRY BAR
Place for storing all the cocktail drinking necessities such as glasses, hard liquor, blender, tools, etc.

CLEANING CLOSET
We could take out some of the lower shelves and store brooms, mops, the vacuum, and cleaning liquids, etc in there.  Of course, we could also put that stuff in the mudroom.

BAKING CENTER
I've seen this idea online, a designated place for all your baking supplies, the bowls, mixers, pans, even the flours and cooking ingredients.  As much baking as 2nd Man likes to do, this is a possibility.

CHINA / GLASSWARE STORAGE
We have extra sets of dishes that we use for different occasions.  This might be a good place to store some of that overflow, as well as extra linens and such, but then I worry it runs the risk of just being another "junk closet" to store random stuff in.

APPLIANCE GARAGE
Of all the ideas we've tossed around, this one intrigues me most.  Using the space to store all manner of appliances that you need, but don't use on a daily basis.  Things like the blender, the slow cooker, toaster, food processor, etc.  It frees up valuable cabinet space elsewhere and keeps them all in one spot.

So, we'll have to decide what we want to do.  As it happens, you'll be the first to know, so keep checking in from time to time.

UPDATE:  2nd Man is leaning toward a bar, leaving the door off and making it like an open cabinet and putting all the glassware and stuff in there (in addition to the standard bar stuff).  I'm of the mindset to leave the door on and that way we can close it, so we'll have to see how that all comes out.

And thanks for a new suggestion, Dawn K, another option would be a laptop station/computer center.


Sunday, August 7, 2011

OUR BAHIA GRASS IS DEAD OR IS IT?

When we went out to the farm yesterday, we noticed that all the grass around the house seemed dead.

Bahia Grass Dormant or Dead?
Or is it?  I did some research on Bahia grass, including checking with my friend whose parents have the ranch and everything pointed to Bahia grass.

I did some googling about it and found its Wikipedia entry HERE.  Seems Bahia grass, which is what we believe this is, goes dormant in severe drought conditions.  Without us there on a regular basis to water, and our lack of any measurable rainfall for months, we're definitely in a severe drought.

So we're hoping that this ISN'T dead, just dormant.  All my research says it should green up rapidly with some regular watering.  I still worry it's dead and I'll be buying grass seed later this year.

Hopefully we'll have rain soon!

VINTAGE VICTORY GARDEN POSTER SUNDAY


Another neat poster, circa 1945, "Grow Your Own Be sure!"

I'm not sure what they mean with the "be sure" tagline.  Perhaps to support the war effort?  But as I always try to do, tying it into today's lifestyle, I could see that meaning to "be sure" of where your food comes from, organic, no chemicals, clean, etc.

Enjoy!

Saturday, August 6, 2011

OREO COWS - GOT MILK??

One year, while driving to the local Texas Renaissance Festival with my friend, we drove passed a farm with these cows and I about ran the car off the road.  Was I really seeing cows that were black on each end with a perfect, white midsection?  OREO COWS?  Really?


I did some googling and found out that they are "officially" called
Belted Galloways.

It's a rare beef breed that originated from Galloway in Southwestern Scotland.  


They are used primarily for beef, but it's said that they are often used to adorn farm pastures with their striking appearance.


Funny thing, they are also informally known as "police car cows", "panda cows" and the description that I used when I first saw them as we drove by, "Oreo cows".

Of course, we'd love to have cows on our property someday (and we just might)...how cool would it be to have cows this neat, grazing on our property?  I'm sure they are cost prohibitive, but still, as cows go, they are pretty good looking!  Who knows what the future holds!

TRIP TO THE FARM FOR MEASURING


Today we are headed out to the farm, we need to take some measurements of the porch so we can plan the railing and new stairs.  We also want to measure some things like the closet doors and doors to the bathroom, so that we can buy new doors when it comes time for painting.

I also hope to take some new pictures and share them on the blog over the next few days.

It will be hot out there, we're over 100 degrees down here on a daily basis, so our time will be limited at the house, but afterward, we'll get to visit with 2nd Family down the driveway and that's always fun.


Then we might stop at our new favorite local restaurant for a quick meal on the way back to the city.  It'll be a full day but hopefully productive!

More later!

Friday, August 5, 2011

BEEKMAN BOYS BLAAK CHEESE IS COMING

Photo Courtesy of: Beekman 1802
We just got the confirmation that our wheel of  Blaak cheese is ready for shipment.  For those unfamiliar, the TV show "The Fabulous Beekman Boys" (Planet Green)  follows Josh and Brent, two guys who bought a large farm/estate in New York.  Among other things, they raise goats and make this cheese from the milk.  It supposed to be delicious.  This will be our first time to get it, since you have to be put on a waiting list to order it.  We've been waiting several months now so we're very excited to try it out.

Side note, that's something we hope to do at some future point, make our own cheese.  Not to this level of course, but it will still be a fun process.  I've already dabbled with Ricotta, Cottage Cheese and Mozzarella.  I'd like to experiment with other styles of farmhouse cheese next.

We'll let you know what it's like when we get it!  It should arrive within a week.

If you'd like to learn more about BLAAK, please click HERE.

CHALKBOARD DOORS

Behold the miracle of "Chalkboard Paint" on a door...


Here it is on the full length of a door...


Just the upper panel is done on this one...


Another full length door...


Here is a double panel door with paint on both the upper and the lower portion...


Here is one done with all three panels...


The best paint to use for a project like this is:
Rust-Oleum Chalkboard Paint
You can read all about it HERE

It goes on all types of surfaces; metal, wood, masonry, drywall, concrete, and more.  You have to apply several coats, I think at least three, and it must dry/cure for three days.

I really love this idea.  We have two spots at the farmhouse that this would be great.  One would be on the dining room door that goes out to the 'future' back porch /deck, as we'll need to buy a new door to replace that one anyway.  The other is an opening into the mudroom/pantry that currently has no door.  I wouldn't mind having one of those swinging doors in that spot and then if we put chalkboard paint on it, we could use it for shopping lists.  The cool thing about both doors is that they face into the dining room, so we could also use them for menus during dinner parties!

When/if I do it, I'll be sure and post step by step photos.

Now, I just need to convince 2nd Man that we NEED a chalkboard door in the farmhouse!

Thursday, August 4, 2011

INSPIRATION THURSDAY


OK, this is just flat out cute!

I'm guessing this is not an actual outhouse, but some sort of storage shed.
It's just adorable.  We just might have to have something like this out there.

Have a nice day, I'll be back on here tomorrow!

Wednesday, August 3, 2011

WOW 10,000 PAGEVIEWS

SERIOUSLY??


REALLY??  REALLY?  YES!  You all have been so kind to us!
As of today, you have viewed the pages on this blog over 10,000 times
since it's inception.

We are humbled and thank you all, each and every one of you, for your visits.

If you had told us a year ago, heck, even six months ago, we'd be at 10,000 hits this fast, we wouldn't have believed it.

At the risk of repeating myself, I know that the best is yet to come.
This time next year, we'll be blogging about decorating and cooking and crafting and everything else that comes along with living part time in the city and spending all our spare time on a farm in the country.

So here's to 10,000 and more!

THE PAINTER IS COMING

Today at noon(ish), I'm meeting the painter at the farmhouse!
Color Wheel
He's going to prepare an estimate for us for repairing the interior walls, sanding, and then painting it all.

Fingers crossed that we get a good estimate and we can move forward with someone who shares the same vision as us.  Please send good thoughts our direction!  If all goes well, we could have the house painted within a week or so and things will start happening fast, finally!

More when I return!

AFTERNOON UPDATE:

The guy was awesome!  So far so good!  He totally shares the same vision as us and he made some great suggestions for things we hadn't thought of doing, plus he had a way of not having to sand and still keeping the integrity of the details on the walls.  He also mentioned sanding and refinishing the floors, and making them look almost new, while still being 70+ years old.

Now we just have to wait for the estimate...
Please let it be affordable...
We could have a new interior within a few days of starting.
And a new interior means a blank slate for decorating!

Tuesday, August 2, 2011

OLD MESQUITE TREE CLOSEUP

Last time I was at the farm, I was out by the "Party Tree"
(for those wondering what that is, see the entry HERE)
and I decided to take a close up picture of it:
(be sure and click on the photo to enlarge it)

Old Mesquite Tree Closeup
I never realized how detailed the bark was.  It's very cool and definitely gives the tree a lot of character.
It's obviously a very old resident of our property.
Now, we just need to come up with a "name" for the tree...

HAPPY SHARK WEEK EVERYONE

We must admit, for city guys who love the country life, we do look forward every year to
Discovery Channel's SHARK WEEK.

Image Courtesy of: Discovery Channel
So, in honor of Shark Week, here is a picture...this isn't a cute picture or a farmhouse picture or a food picture...or a flower picture....
it's just a really cool picture!

Great White leaping out of the water
Or is it scary?  Enjoy?  Or be afraid?
Kind of makes me glad we DON'T live near the ocean and chose the country life instead!

Monday, August 1, 2011

SLOW COOKER MUSHROOM ONION BEEF ROAST RECIPE

Yesterday, we had our first meal in our Slow Cooker / Crock Pot and it was delicious!

Here are the pics, followed by the recipe.


Beef in bottom of Crock Pot
Mushrooms mixed with ingredients 
Ingredients on top of beef
Lid on and 8 hours to go
Finished dish over rice
It was really very, very simple, with a few modifications from 2nd Man.


INGREDIENTS:

3 1/2 - 4 lb beef roast, cut into bite size portions
1/2 cup flour
1 8oz pkg of sliced mushrooms
1 pkt onion soup mix
1/2 Cup dry red wine
1 can French Onion soup


Spray bottom and sides of an oval crock pot with cooking spray or olive oil.
Put meat in a Ziploc bag with flour and shake until coated.
Place flour coated beef chunks in bottom of crock pot.
Mix together mushrooms, onion soup mix, wine, and can of french onion soup in separate bowl.
Pour over beef, then place lid on slow cooker and cook on low for 7-8 hours.


Ours came out tasty and oh so tender.  2nd Man baked a couple dozen homemade yeast rolls earlier in the day, and then made a pan of simple white rice with butter.  We spooned the beef with mushroom onion gravy over the top of the rice and served with a roll.  Simple and delicious and best of all, easy.  After only about 5 minutes prep time, I put the lid on the cooker and we didn't think about it until 8 hours later.  Well, that's not entirely true, we smelled it all day long and stayed hungry, so we DID think about it, ha.
It was most definitely worth the wait!


Try it, I think you'll like it.

OPEN SHELVES IN THE KITCHEN

Since there are no overhead or wall cabinets in the kitchen at the farm, we will need some additional storage and one thing we've always liked the look of are open shelves.


Unfortunately, there is no place in the city house to put open shelving, but at the farm, we believe we have found the perfect spot.


In this picture, you can see where we'd like to put the shelves, on either side of the kitchen window:


So below, I present some of the ideas I've found across the Internet for what I'd like to do in our own farmhouse kitchen with open shelving:


This is a nice look, two shelves on each side of the window.  Painting it all the same color as the window trim is a nice touch.  It makes for an almost "built in" look.


I really like the minimalist look of
these shelves.  Simple brackets, simple shelves, same color.  Very "clean" looking.  This is
2nd Man's choice.


This one is very pretty.  I like the detailed brackets, and painting the shelves a different color from the supports almost makes them stand out as an architectural element.


Another one that has some nice details and it's all painted the same color, again, almost blending into the wall and making the items on the shelves become the focus of the room.


Here is another very minimalist design, kind of reminds me of a "Shaker" style or design.  I do like the stained wood look, it really compliments the color of the counter tops and the wood detail on the back splash.


Now I just love this one.  I think the metal
brackets against the white look beautiful and old world.  However, they might be a bit TOO old world for our farmhouse, but they still sure do look nice.


This is something that will be very easy to do, just mounting shelves on each side of the window.  But I think our hardest decision will be deciding what kind of shelf brackets we want?  Wood?  Metal?  Ornate?  Plain?  Painted the same color as the walls?  Or the color of the window trim?


Funny, I just looked back at the photos and realized that all 6 are shelves on white walls (one is questionable white, could be "off white", ha).  That's exactly what we are doing, painting the whole house white so we can have that airy, bright, summery, cottage feel and it's kind of funny that I was attracted to pictures that were all white walls.  Perhaps that's a sign we're on the right track!


These are the fun decisions we will soon get to make!


UPDATE 10/2011: Well, as often happens, plans change.  Here is how we ended up solving the open shelving problem:


This is almost "after", at the time of this photo, we hadn't finished cleaning up the counter, floor, put new knobs on, etc.  But what we did for the solution was to have cabinets built instead of shelves, but leave the doors off so that they matched the lower cabinets.  It almost looks like they have ALWAYS been like this.  We think it was the right choice.