Monday, October 31, 2011

HAPPY HALLOWEEN


Hope you get all the candy and treats you can eat!

I LOVE this time of year, not just Halloween, but everything, the weather, the holidays, the way the trees look, the decorations, the food...it is definitely a fun time of year to be with family and friends...

And speaking of friends, this one is for Kelly...I still remember!


Cackle like a witch...
Talk like a vampire...
Howl like a werewolf!

Be safe and have a great Halloween

DINING ROOM WALL OIL LAMPS

Wall mounted oil lamps in the dining room
We finally got the oil lamps put up in the dining room.  We found these online at the really cool mail order/store LEHMANS.  They have a huge amount of oil lamps and accessories as well as a lot of other "non electric" fun stuff.  These were pretty inexpensive, which was a huge plus, and will let us try out what it's like to have only lamplight at night in the dining room.  We bought five of them, and put one centered in between each window frame, as you can see in these photos above and below.

More wall mounted oil lamps
This photo also shows the 4th and 5th ones, mounted in the center of each piece of wall all along one side and the end.  They were, of course, all mounted at the same height.  We measured down from the top, it's easier that way because floors can sometimes be uneven, and due to the height we wanted, we were closer to the ceiling, i.e. less space to measure, less room for error. 

If you ever do get oil lamps of any kind, it's good to do as we did and make sure to get the best quality lamp oil you can locate.  We found a brand that is 100% pure paraffin oil that is guaranteed to be smokeless, soot less and odorless.  That's very important, especially on white walls.  You will pay a little more, but trust me, you'll save work, worry, and cleaning later on.  Another plus was that these lamps hold a small amount of oil in each so one bottle of lamp oil worked perfectly divided between the five of them.

We didn't stay until dark, so we don't know how they look all lit at once.  Our plan next weekend is to stay until dark so we can fire them up and see what the room looks like lit the old fashioned way.  Fingers crossed!


You KNOW I'll have pictures!

Sunday, October 30, 2011

PHEW, LONG DAY BUT BACK HOME


Phew, what a long day we had.  Long weekend actually.  Got a lot done, but we'll have many many more weekends like this one.  It was good and fun and rewarding, but it's a lot of work creating something out of nothing!

On our short checklist, I got the all the switch plates put up, the shelving built in the mudroom (ugh, that's a story in itself), the static doorknobs on, the oil lamps in the dining room put up, shelf and drawer liners, LOTS of cleaning by both of us, and some stuff rearranged.  Didn't do much outside, but there is time for that.  We need to focus on the inside right now. 

Didn't get to a couple of the things, but that's partially our fault for getting out there late each day, and then the fault of the Ikea shelving (again, more on that in a future post).  But as long as things are getting done, I suppose that's all that matters.  We have to remind ourselves that we have it, it's ours, and there is no time limit or deadline.


VINTAGE POSTER SUNDAY

Dig For Plenty Victory Garden Poster
First off, I like the graphics on this one, very nice.  I think the gist of this one was that you needed to grow your own food, and if you didn't, then you'd have to eat the allotment of rations that you would be provided.  Of course, eating your own would be better (and you could eat more).

I can't relate this to today, at least I hope we don't ever get to the point of having rations and allotments, ha.  But I guess we could say today that you could either "grow your own food or pay high prices at the store".

We'll be at the farm again all day today.  Yesterday was a great day, we just ran out of time (got out there later than we had hoped) so today we'll have still more to do.  I'll have the updates soon, I promise.


Enjoy!

Saturday, October 29, 2011

MASTER BEDROOM COMPLETE


Here is a view of the master bedroom looking back toward the closet and bath.  You can see the new white walls, the redone floor and just the overall brighter and lighter look...


Here is the angle toward the windows in the room, the window frames were redone as well.  You can catch a glimpse of the new half walls dividing the sitting area from the master bedroom.  


Here is the angle from the middle of the room looking toward the new area, a sitting area/reading area.  We had the new walls built and the support columns put inside the walls.  There was a center support that was removed. The new threshold was put it but at the time this photo was taken, it was not yet stained but that has been done now. 


Here is the area inside.  It's not huge, but big enough for some bookcases on each side, and a couple of big comfy chairs with ottomans.  Or chaise lounges?  Decisions decisions, ha.  We would like it to be a reading area, lots of light, and a nice place to sit and relax with a book in hand.

FARMHOUSE WORK TODAY


We are off to Seda Bolsa today.  For new visitors, that's the name of our farm, you can read how we came up with the name by clicking HERE.


Even though we started doing some things last weekend, this is our first real weekend of being able to do it without anyone else there or left behind trash and tools and ladders.  


So, we have a lot of to do, and it all begins now!  The Jeep is loaded up with cleaning supplies, the vacuum and steam mop, some small furniture items, tools, and other things we want to take and either use today or leave out there for future use.  On the way, we hope to stop at Ikea and pick up the corner unit of GORM shelving for the mudroom.  Looks like while 2nd Man is busy cleaning windows and floors, I'll be building furniture.  The upside is today it a BEAUTIFUL day in this part of the state, cool weather, sunny, clear...it's one of the rare days we have and we want to take full advantage of it.


There probably won't be any updates today during the day, but I'll be back later with lots to share and of course more photos!


Have a great day, we hope to have one ourselves!

Friday, October 28, 2011

PART OF BATHROOM COMPLETE BEFORE AND AFTER


Here is part of the bathroom, after we took out the carpet that was in there and replaced the toilet with a new one...


...and here it is after, with the walls painted and the new flooring in.  So much brighter and cleaner looking.  This picture is just from one angle, I'll have to get one from the other angle (toward the sink) when I get the new vanity built and we hook up the sink.  That should happen this weekend.

GUEST ROOM COMPLETE PART 2


When I posted the guest room pictures earlier, I realized I should show you this.  There was a doorway from the guest room to the dining room, and we had that closed up. It looks like it's always been this way.

CLOSET LIGHT PULL CHAINS

Pull String Before
Pull Chain After
Sometimes, it's the little things. The closets had pull strings on the lights, so I went to the hardware store, and got a nice chain with a pull in a brushed nickel finish. A few dollar investment pays off and adds a little extra pizazz.  I had already put in the fluorescent bulbs I blogged about HERE, but of course didn't want to do this until they were done.  Each chain came in a package with the pull for just about $3 each as I recall.  About 5 minutes later, and all three closets have a bit cleaner look, not to mention a bit of retro style to them.  Looking back, I wonder if I should have gotten something in a bronze, considering the color of the hardware on the static closet door knobs, but for now, these will definitely be better than strings.

GUEST ROOM COMPLETE


This is the view looking into the guest room.  The floors in here were in a bit worse shape, they had some staining and discoloration, but since we weren't having the floors sanded completely, we just had it cleaned, stained and resealed.  They came out pretty good.  In this picture, for some reason the door frame looks like it's not white, but that's just a trick of the flash.


This room changed the most and also needed the most repair work.  There was a window unit in that set of windows in the above picture that had leaked, causing staining and water damage.  The window frames had never been painted either, just raw wood, and the closet doors wouldn't even shut with all the layers of paint on them.  Now they do!


Here is a view of the guest room looking into the bathroom.  There were a lot of baseboards replaced in this room as well.  He matched them up and now they look like they've always been there.

Thursday, October 27, 2011

INSPIRATION THURSDAY


Hidden Birdbath
 
We've always liked this look, a hidden "object" in the midst of some flowers and bushes.  In this picture I found online, it's a birdbath that is tucked into the middle of a group of flowering bushes.  I like that your eye could catch a glimpse here or there, depending on what angle you are seeing it from.

If could be a statue or a birdbath or some other piece of art.

OK, today is my blog day off, so I'll see you back here tomorrow with more pictures of the finished remodel!
Thanks for visiting!

Wednesday, October 26, 2011

RETRO GLASS SALT CELLAR WITH LID

Glass Salt Cellar with Lid
Snagged two of these tonight on the way home, at of all places, Walmart!

I was in there looking for an inexpensive bath rug, to put in the bathroom until we start decorating that area, and I saw this and just couldn't resist.  They were very affordable and made by Fire King.

I love the retro/vintage look of them.  That's something we often do, mix old and new.  When you put something new, that's styled to look old, in an old setting like this farmhouse, it can really make people just assume it IS old. That's a great decorating tip.  Same holds true with expensive items mixed with inexpensive. They just sort of blend together and no one is the wiser
(unless they read our blog, LOL!)


Anyway, 2nd Man loves to use salt from containers like these during cooking and we usually have one for pepper as well.  I figured we could just turn one of them around so that the word "salt" is in the back and then we can fill it with pepper.  My thought was that these would be perfect to put on the marble top table next to the stove.


UPDATE:  And here they are in their new home (not filled yet of course).


Salt Cellars in their new home
I'd link to them on the website but I don't see them on the WalMart website.  It may be something in local stores only.  They do, of course, sell them elsewhere online, click here for Glass Salt Cellars of all types on Amazon. For the one like we got above, you can click here for it Anchor Hocking Fire King Glass Salt Dip.

CHANGING OUT THE LIGHT FIXTURES


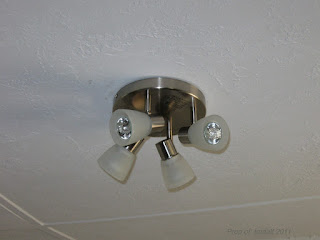
One of the things I did in the kitchen was replace the light fixtures and ceiling fan in the kitchen with our new halogen light fixtures.  This was the old light (nothing of collector value) so I told them not to worry about painting it when they did the ceiling.  You can see they took my advice, ha.


First thing I did was remove the old one and wire it all up correctly (wiring is not as scary as it seems, just make sure the breaker is off to be as safe as possible).  Black to black, white to white, hook up the ground, screw it to the mounting bracket and...


...here it is mounted, with the glass shades attached and halogen bulbs in place, just waiting for the final test...flipping the switch.  So we did and...


...let there be light!  I did it right!  We liked this fixture because each halogen can be directed to where we want it. For example, we pointed one toward the new yellow cabinet, one toward the future pegboard wall, one toward the marble table and one toward the end of the counter.  It really lights up the room and there is another one just like it at the other end of the kitchen where the ceiling fan was.  just forgot to get a picture of that one.

DINING ROOM WITH NEW TABLE


This is how we started, well actually, it was still wrapped in packaging.  The table is solid mango wood (sustainable, we love that part) but IT is VERY heavy.  It was all the two of us could do to get it flipped over.  But we did...


...and here it is in the room.  It really fits nicely.  The table seats eight, three on each side and one on each end.  Now we just need some chairs.  We aren't sure, now that it's in the space, what we want. Multi shaped chairs?  Different chairs of the same color?  Same chairs in different colors?  


It is almost the same color as the floor, it looks very nice.  Of course we can't decide if we want a large rug under it or not.  We go back and forth on that.  Whatever happens, we can't wait to eat our first dinner on it...after we get some chairs of course!


Tuesday, October 25, 2011

LITTLE PANTRY BEFORE AND ALMOST AFTER


Here is the small pantry that is in the kitchen.  The door was removed (we'll repurpose that) and everything was painted, then we matched the flooring. We still don't know what this will become, open storage of some sort, but we are happy with the outcome.  I did a blog post back HERE about what to convert this space into.  Now that it's here and ready for it's "conversion", does anyone have any ideas?  We'll have the mudroom for our pantry so canned goods and supplies can go out there.  This space will defnitely be cool as some sort of dedicated open storage, but we are just not sure for what?  I'll take suggestions.

MANGO WOOD PIZZA BOARD


Just saw this while looking online for some farm stuff and doing a bit of preliminary Christmas shopping list preparation.  It's an over sized pizza board with server, though it can be used for breads and other dishes as well.  It's made of the same wood as our table, "Mango Wood" which is sustainable and doesn't use old growth wood.  I love that.  I'm thinking this might need a home at the farm.  Wouldn't it look really cool hanging on the wall in the kitchen??


Over sized mango wood pizza board

KITCHEN FLOOR BEFORE AND AFTER


Here is the kitchen floor before they started refinishing it.  Now mind you, we didn't have them sand and redo it from scratch, that was cost prohibitive.  We had them clean it well, stain it, and then seal it
with a satin finish (didn't want the glossy bowling alley look)... 

...and here it is after (from the other angle).  It's definitely an improvement and looks like what we had hoped.  There is a bit of a glare, but it's a beautiful deep chocolate brown with a lot of character. We didn't expect it to look brand new and didn't want that, we just wanted it to look like an old floor in pretty good shape.  We think we accomplished that.  

LIVING ROOM FINISHED


Here is the finished living room.  Floors redone, walls created and painted.


This is a view from the front entry looking toward the kitchen.  New trim, door moulding, and of course the paint and floors done. 


I took this photo looking through the window on the porch and into the living room (that doorway is the master bedroom) right after the floors had been done.


Toward the new front corner, this was an open space with no corner, and we had it walled in to create a separation of the entry space and the living room space.

Monday, October 24, 2011

NADEAU FURNITURE IN THE KITCHEN


Here is some of the furniture we got at NADEAU, put in their new home.  This marble top table will be right next to the stove...I foresee lots of dough rolling out here.


Here is the yellow hutch we bought, in it's new home in the kitchen.  It fits the wall perfectly.  The color is great and I can position one of the halogen lights to shine right on it!


Here is a view of the kitchen from one end toward one side, you can also see the new lights (well at least one of them) in the picture.
Ready for decorating! 

FINISHED INTERIOR WHERE ARE THE PICTURES?

I took a lot of pictures yesterday, but unfortunately, because we got home late, I wasn't able to sort through them quick enough to get them into any sort of organized form by today.  I know a lot of you have asked me about them.  That will be tonight's project.
It all looks great and we're happy to have it done.

Until then, enjoy a bonus "Inspiration Thursday" picture...
This is a butterfly garden...I love the wild and natural look of it, and yet it still has plants of different heights in a layered look to make a nice visual effect.  It's sort of wild and planned, all at the same time.

Butterfly Garden (click to enlarge)

Enjoy and check back later for inside pictures!

30000 PAGE VIEWS

30000 Page Views
Sometime during the night, we passed 30,000 page views!

All we can do is continually say thanks, and please keep visiting.
We appreciate you all more than you realize.  Things are just now starting to get exciting for us and we'll have so much more to share.  It'll be lots of work, but we'll share it each step of the way.

Sunday, October 23, 2011

BACK FROM THE FARM

We are back from the farm!

Stayed until almost dark.  I took pictures of course, but I'm not sure I'll get those up tonight.  I'll work on it tomorrow and throughout the week.

Long story short, we got there and while they had cleaned up some of the trash, there was still quite a bit left around the house, as well as a big pile in the front (seems the guy in charge of trash had something come up).

We spent the day cleaning up, I put up the new lights in the kitchen, 2nd Man cleaned the bathroom (except the tub, need to wait for some plumbing issue to be fixed in there), we moved the furniture into it's place, assembled the dining table, I put on the cabinet knobs in the kitchen, new light pulls, put on the switch plate and outlet covers, and just did some general organizing.  They are baby steps but it's what we need to do to start.

More during the week!

OFF TO SEE THE RESULTS TODAY

The First Photo I Took
We are off to see the farmhouse for the first time since it's been done, and we're going to start doing some of the extras we've been wanting to do.

We didn't make it yesterday, spent the day running errands for the farm, getting some cleaning supplies, putting all the stuff together we want to take out on this trip, etc.  By the time we finished our errands, it was late in the day and we wouldn't have had much time out there.

Above is the very first photo I took of the farm driveway, over a year ago as we were given the opportunity to buy it.  I took the picture before we walked down the driveway.  Of course, we knew the family for years and years, and had been out there many many times, but I took this photo after we knew we would, hopefully, own it, when we were walking down the driveway to the house.  Somehow it seems nice that we've come full circle.

So, as you are reading this, we'll have been at the farm for a few hours.  I should have LOTS of pictures, maybe some videos, and stuff to share.  I'm thinking this is the beginning of us really starting to create the farm we hope to have for our future.

More later!

VINTAGE POSTER SUNDAY


Registered War Garden Poster

This is an AWESOME poster.  The information on it is so fascinating. They had to register their gardens.  Feed Yourself!  Be a Soldier of the Land!  Exempt No Land!  A War Garden Will do it!

It seems they were certainly adamant about it, huh?  And not only were the gardens registered, they were apparently "protected" as well.

Of course, trying to tie it into today, I'm not sure I'd want the Government  having us register our gardens, ha, but still, it's a fascinating glimpse into history and a time when this was done.  I love the bottom tag line too,
"Food Will Win the War!"  Too subtle?  LOL!

Enjoy!

Saturday, October 22, 2011

GALVANIZED TROUGHS AS RAISED GARDENS

Water Trough Garden
I stumbled across this today as I was surfing the 'net and I am intrigued.  We are going to have raised bed gardens and as I was going to do the research, I found this: Using galvanized metal troughs, with holes drilled for drainage of course, as the raised beds.  Anyone seen this before?  Thoughts?  It's interesting!
UPDATE: I'm working on a blog article about this topic, coming soon!

INSIDE WORK IS FINALLY DONE

The painter/contractor called and he's finished!  They are cleaning up trash and debris this morning and then it's all ours once again.

We've got SO many to dos on our list, so we'll be going out there today or tomorrow.  I know that there will be lots of updates coming soon on the blog.  We've got lights to put up, fans to put up, doorknobs to put on, pull chains for closet lights, measurements to take, three pieces of Nadeau furniture to put in their new homes, sink vanities to build, and the list goes on.  Not sure we'll get it all done this weekend but it's great to know that we can start doing it now!


This is almost as exciting as the closing was!  More later!