A lot of you have been curious about our hives and the process involved. Since I'm a newbie beekeeper (or is that newbee?) I'm having to learn it all from books and other blogs so to return the favor, I'll share our journey here!
One thing I was nervous about was painting. When you buy your hives, you can buy them either painted or unpainted. We wanted traditional white hives (with a barn red twist) and since my woodworking skills are still in their infancy, we opted for unpainted but already built. It is, generally speaking, about the least expensive option, short of buying them unpainted AND unassembled.
The first big choice is what type of paint to use and how to apply it.
The graphic below was very helpful to me, I'm a visual person and like to see it. This image comes from the Essex County Beekeeping Association.

I decided on a low VOC paint that had primer mixed in. There is a lot of chatter and information about type of paint to use. Since the interior of a beehive should NEVER be painted or stained, exterior paint/stain is sort of a personal choice. Of course, painting/staining is optional, many beekeepers leave their hives unpainted and let them weather naturally. With our high humidity and hot Summers, we needed paint to keep them from weathering TOO fast. Painted wood exposed to the elements 24/7 will age rapidly and so the paint will slow this process down. The white color will also keep the ladies cool in the heat of our Summer.
We chose an exterior paint, Zinsser brand, called Ultra-White. It's a more high end paint but it's guaranteed for 5 years not to fade, peel or mildew/mold. It's used to paint barns and white picket fences. We'll soon see!
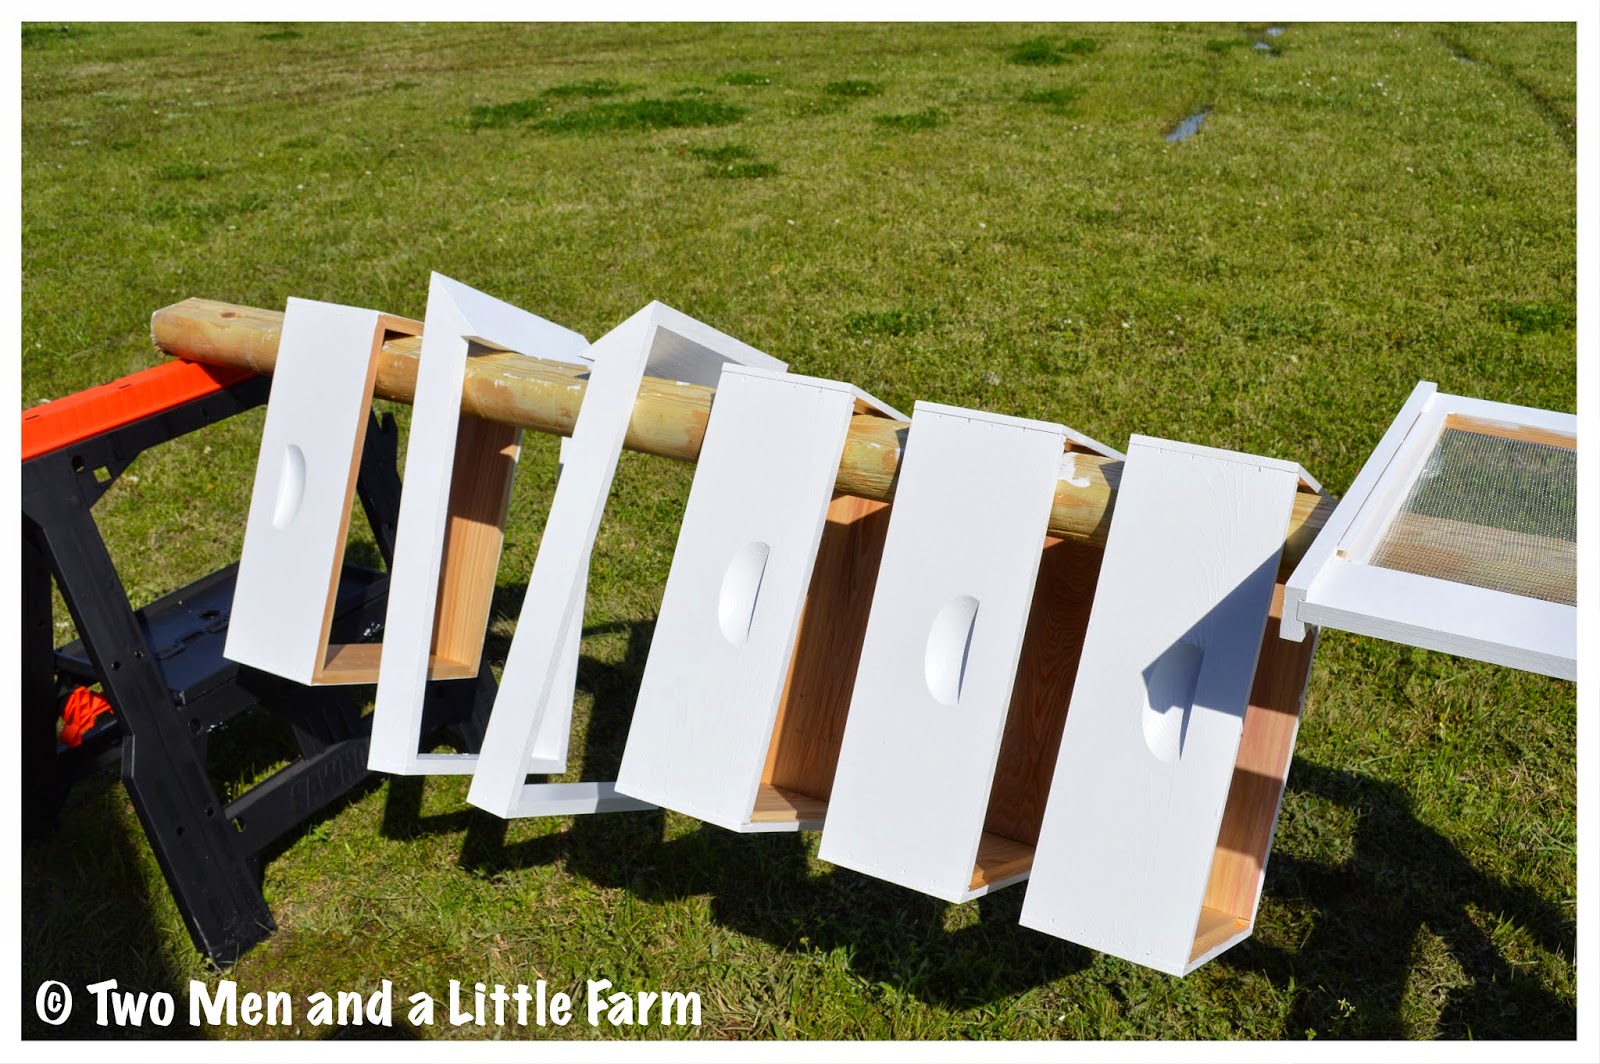
Since a hive box, other than the top/roof, is open ended, I stood there for a bit to figure out the easy way to do it. I thought about hanging them somehow. I had two sawhorses and as fate would have it on the day I painted, I had just bought the landscape timbers for the flower beds. I looked at it all laying there, put two and two together and voila!
 |
| Painting beehives |
It made life SO much easier. I could paint one side of all of them at once, then just flip them around to the next side and paint them all again. I'm sure I'm not the first to figure out this method but hey, I was excited to come up with it by myself using the stuff I had on hand, LOL!
 |
| Easy way to paint beehives |
I painted the hive bodies, the bottom boards and stands using a sponge roller. It went on easily and quickly. Interesting side note, while it's not entirely clear when and why hives were first painted white, it is believed that white is a clean color and of course connotes purity. That implied the honey was clean and pure as well and people might be more apt to buy honey from 'pure hives'.
 |
| Painting beehives white |
It took about four coats to get a nice finish. With the sunny day I had, each coat of the latex paint dried quickly. Oh, I forgot to mention, I used a semi-gloss latex because it's easier to keep clean. A flat matte finish will attract mildew and dirt. I suppose gloss isn't really necessary but it's up to you.
 |
| Beehive painting |
Since we got the copper, English style roofs, they were a bit harder to paint. Fortunately, they have this convenient little ridge along the top that let them sit flat and so I used a smaller regular brush and painted the ends and sides. The red is called "Colonial Red" and it dried darker than it went on and became a perfect barn red! While this is a dark color, the roof is more of a decorative element and won't impact heat inside the hive.
 |
| English garden hive copper roof |
The last thing I had to do was tape off the copper and paint the top ridge, the same white as the hive bodies.
 |
| Barn red and white beehives |
We loved this picture because it shows how they will match the barns. Even though they aren't near them, it will tie in something on that side of the property with something on the other side. I don't have the pictures of them put together because they tend to stick if not allowed to completely dry...so the roofs will stay off until the last day.
There will be several beekeeping related posts this week as we anticipate their arrival at the end of the week.
Tomorrow, the beehive area I finished over the weekend!
Tomorrow, the beehive area I finished over the weekend!
Here are our previous bee related posts leading up to the big day:
It's gonna BEE an exciting week!

You must be so excited! I would bee :O)
ReplyDeleteLOL, I see what you did there, ha. Very excited!!
DeleteThey're bee-utiful.
ReplyDeleteHa!! Love it, thanks!
DeleteHey, you learn something new every day. Very smart idea for painting the hives.
ReplyDeleteDitto, I'm learning stuff every day myself.
Deleteyour bees are going to look very posh
ReplyDeleteHa, posh bees, fit for a queen? ;-)
Deleteyou guys are SO organized. these are going to look fabulous. i can't wait to see them set up!
ReplyDeleteIt's the whole nesting thing....ha. Thanks!!
DeleteThe hives are going to look awesome once they are all set up. I can tell that Happiness is Bee side you.
ReplyDeleteTime is Honey.
Life is the flower of which love is the honey
– Victor Hugo
When all set up and ready for your bees, don't forget to put up a 'Bee Crossing' sign. :}
Aww, you are so sweet. Thanks for that, love it!
DeleteYES! I have a sign on order.
They look fabulous. On the other side of the world I am soooo excited. And safe from bee stings which blow me up like a barrage balloon.
ReplyDeleteHa, I hear ya. Live vicariously, it's ok and safe!!
DeleteI can't wait to read about their arrival. Clever you, thinking up that painting trick. I wouldn't have thought of that. They will look cute matching the barns and all!
ReplyDeleteI have no idea where it came from but somewhere inside it made sense. I guess necessity is the mother of invention as they say!
DeleteYour new banner looks great!
ReplyDeleteVery clever how you painted the beehives - you worked smarter, not harder! I love how they have the same color of paint as the barns.
Thank you. I was quite happy with how they came out. Maybe I'll inspire someone else, ha.
DeleteGreat job, they are going to be so pretty. I am not sure I've seen a hive painted like that. Great thinking. And your new banner at the top is lovely too. Love your blog by the way!
ReplyDeleteThanks!! And thanks about the banner, I thought we need a 'refresh'. And thanks for the kind words about the blog. Come back!
DeleteLove it. You are very creative. I read your blog every day but I don't usually comment. BUT I want bees so badly and so I'm excited to watch your progress. Peg
ReplyDeleteWell thank you very much Peg! Hope you'll comment from time to time!! Thank you again!
Delete1st Man,
ReplyDeleteIt's a real good thing you investigated how to paint your bee hives, and what paint to choose.
Most people don't check this out before hand, they just paint with what ever paint they have on hand. Since this is an investment for the homestead/farm, I would have done the same research.
Your bee hive boxes look beautiful and match the barn, I can't wait to hear more about your bee's in future posts.
Thank you sweet Sandy!! Yeah, I've been reading till my eyes crossed and then just went out and did it, ha. And of course they had to match, right? Ha. Thanks!!
DeleteBEE-u-ti-ful!!!!!! I can't wait to see it all put together!!!!
ReplyDeleteThank you!!!
DeleteHi! I oiled my first hive and as I did it I was worrying about how I was going to get my 2nd hive painted. I plan to do barn restore match my other barns. This idea is brilliant. Do you have any finished photos?
ReplyDeleteHello! Congrats on getting bees. Yes, I have lots of photos. If you'll look at the post above, just above where the comments start, it says "labels" and "BEES". Click on the word "bees" and it will show all the posts I've put up about them. They came out really nice. We also added a third box (super).
Deleteif you have trouble or need something, let me know!! I'll be glad to help. I'm learning too!
Pictures now that it's done?
ReplyDeleteOn your other comment I showed how to pull up the posts but let me give you this link to a post that has some good pictures.
Deletehttp://twomenandalittlefarm.blogspot.com/2015/07/girls-moving-on-up.html
Hope that helps but like I said, feel free to ask anything!
Thank you for posting how to paint a beehive. We are new to beekeeping and while we are planning to paint our hives white, we wanted some color in them and the Red Roof that you have is perfect! And you set-up for painting is ingenious!I will be giving it a try! :-)
ReplyDelete